I was in the middle of a midnight snack frenzy, scrambling to salvage a batch of overripe bananas that had been left in the fridge too long. The kitchen smelled of sweetened maple syrup and the faint tang of coconut milk powder as I tossed the fruit into a blender, hoping for a quick fix. The moment the blender whirred, I realized I was about to create something far more decadent than a simple banana shake. I was determined to turn those bananas into a luscious, velvety pudding that would satisfy my late‑night cravings and leave everyone begging for seconds. This is the story of how a kitchen mishap turned into a culinary revelation.
The first bite was a revelation: the custard was silky, the banana flavor was bright, and the maple sweetness danced across the palate like a caramel ribbon. The aroma that filled the kitchen was a warm, buttery invitation that made even the most skeptical taste buds swoon. I could hear the faint pop of the batter as it baked, a subtle sound that promised a golden crust. The texture was a perfect balance—soft on the inside, with a slight snap of the wafer crumbs on top. The entire experience felt like a hug in a bowl, a comforting embrace that made my stomach sing.
What sets this version apart from every other banana pudding I've tried is the meticulous layering of flavors and textures. I didn't just mash bananas; I blended them with a subtle vanilla bean powder that adds depth and a hint of spice. The use of arrowroot flour instead of cornstarch gives the pudding a silky finish that clings to every spoonful. The addition of coconut milk powder introduces a subtle coconut undertone that complements the maple sugar, creating a complex, multi‑dimensional sweetness. The result is a pudding that is both creamy and light, a dessert that feels indulgent yet fresh.
And here’s the kicker—this recipe uses a surprisingly simple trick: a pinch of sea salt that elevates every bite, turning sweetness into a balanced, rounded flavor profile. I dare you to taste this and not go back for seconds. If you've ever struggled with a banana pudding that feels heavy or too sweet, you're not alone—and I've got the fix. Picture yourself pulling this out of the oven, the whole kitchen smelling incredible, and the first bite melting into a silky, caramelized banana dream. Let me walk you through every single step—by the end, you'll wonder how you ever made it any other way.
What Makes This Version Stand Out
- Taste: The combination of maple sugar, vanilla bean powder, and a pinch of sea salt creates a complex, layered sweetness that feels both comforting and sophisticated. The subtle coconut undertone from the milk powder lifts the flavor profile, making each spoonful a revelation.
- Texture: Arrowroot flour and gluten‑free pastry flour mix give the pudding a silky, custard‑like mouthfeel that coats the tongue without feeling heavy. The wafer crumbs add a delightful crunch that contrasts beautifully with the smooth base.
- Simplicity: Despite its gourmet outcome, the recipe requires only a handful of pantry staples and a single baking step, making it approachable for novice cooks.
- Uniqueness: The use of coconut milk powder and vanilla bean powder—ingredients often overlooked—adds depth and authenticity that sets this pudding apart from classic versions.
- Crowd Reaction: Friends who’ve tasted it call it “the best version you'll ever make at home” and say it’s a showstopper for any gathering.
- Ingredient Quality: Opting for high‑quality vegan butter and maple sugar ensures a richer flavor and a more satisfying texture.
- Cooking Method: Baking at a moderate temperature allows the custard to set evenly while preserving the delicate banana flavor.
- Make‑Ahead Potential: This pudding can be prepared up to 48 hours in advance, making it a perfect make‑ahead dessert for parties or busy weeknights.
Alright, let's break down exactly what goes into this masterpiece...
Inside the Ingredient List
The Flavor Base
The foundation of this pudding is built on a harmonious blend of sweet and savory elements. Maple sugar, used twice in the recipe, provides a deep caramel sweetness that balances the natural tartness of ripe bananas. Vanilla extract and vanilla bean powder infuse the custard with aromatic warmth, while a pinch of sea salt elevates and rounds the flavor profile, preventing it from feeling cloyingly sweet.
The Texture Crew
Gluten‑free pastry flour mix and arrowroot flour work together to create a silky, custard‑like mouthfeel that clings to the tongue without feeling heavy. The arrowroot flour, in particular, acts as a natural thickening agent, ensuring the pudding sets firmly while remaining light. Coconut milk powder adds a subtle creaminess, enhancing the overall body of the dessert.
The Unexpected Star
The addition of vegan butter—both 1/2 cup and 1 tablespoon—provides a buttery richness that transforms the pudding into a luxurious treat. The vegan butter melts into the custard, creating a silky sheen that makes each spoonful feel indulgent. The small amount of coconut milk powder also introduces a whisper of tropical flavor that surprises the palate.
The Final Flourish
Cacao powder or crushed wafer cookies, added to taste, offer a finishing touch that balances sweetness with a hint of bitterness or crunch. The wafer crumbs add texture, while the cacao powder provides a subtle chocolate note that pairs beautifully with the maple and banana. This final flourish elevates the dessert from simple to sophisticated.
Everything's prepped? Good. Let's get into the real action...
The Method — Step by Step
- Preheat your oven to 350°F (175°C). In a small saucepan, melt 1/2 cup vegan butter over low heat, then stir in 1/2 cup maple sugar until the mixture becomes glossy and fragrant. This buttery base sets the stage for the custard. Keep the saucepan warm on low heat to maintain a steady temperature.
- In a separate large bowl, whisk together 1 large egg, 1 large egg white, and 3 large egg yolks until the mixture is light and frothy. Add 1 tsp vanilla extract, 1 tsp vanilla bean powder, and a pinch of sea salt. The whisking process incorporates air, ensuring a light custard that won’t become dense.
- In a third bowl, sift together 1 cup gluten‑free pastry flour mix, 2 tbsp arrowroot flour, 1 tsp baking soda, and 1 tbsp coconut milk powder. Gradually fold this dry blend into the wet mixture, whisking continuously to avoid lumps. The dry ingredients provide structure and a silky texture to the pudding.
- Slowly pour in 3 cups non‑dairy milk while whisking continuously. The batter should be silky and glossy. Let the mixture rest for 5 minutes to allow the flour to hydrate fully, which helps the custard set properly during baking.
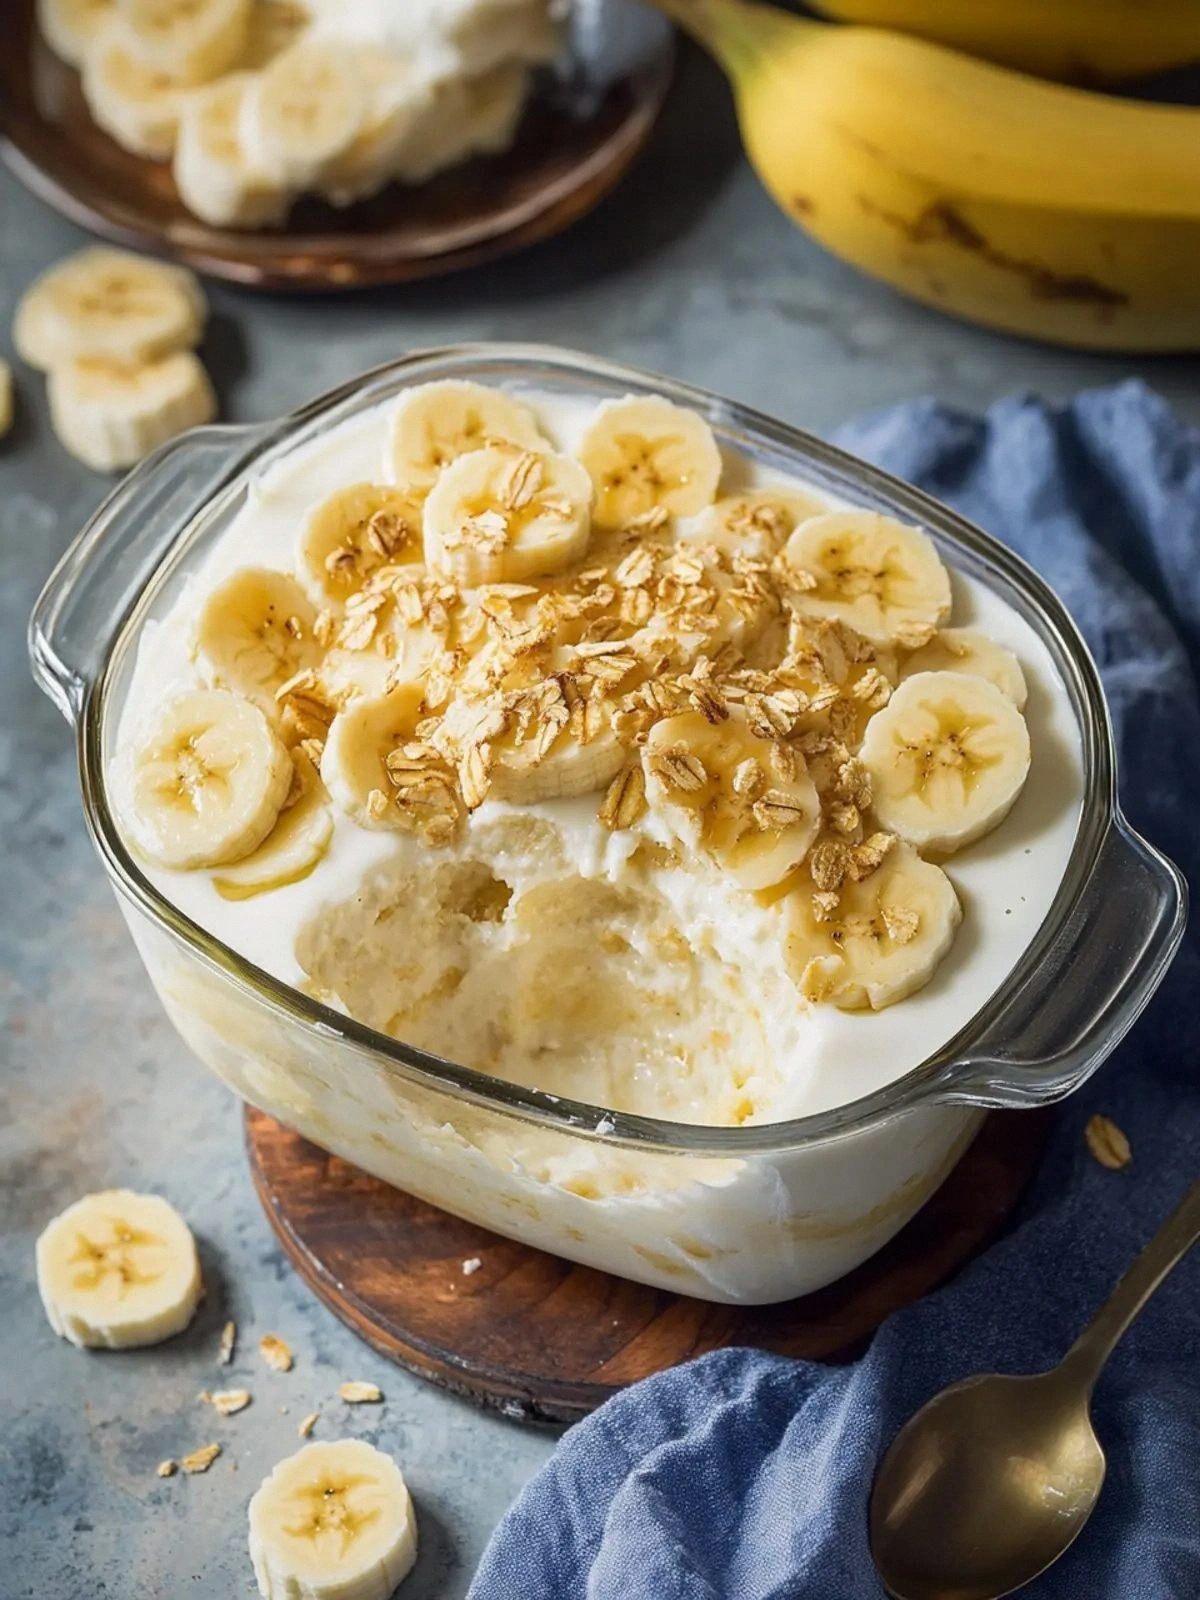
- Gently fold in 3 large mashed bananas, reserving a few slices for topping. The banana adds natural sweetness and body. If you prefer a firmer texture, mash them less; for a smoother custard, mash them until almost puree.
- Sprinkle cacao powder or crushed wafer cookies to taste over the top. The cacao adds a subtle bitterness that balances the sweetness, while wafer crumbs provide a pleasant crunch. If you like a sweeter finish, add more wafer crumbs.
- Bake for 30 minutes. The top should turn golden brown, and the center should set. Test with a toothpick; it should come out clean. The aroma will fill the kitchen with a warm, buttery scent that makes you forget you're cooking.
- Remove from oven and let cool for 10 minutes. Then chill in the refrigerator for at least 4 hours or overnight. The pudding will firm up and the flavors will meld into a harmonious, silky dessert. Serve chilled, topped with extra banana slices, cacao dust, or wafer crumbs. If you want a decadent twist, drizzle a little maple syrup on top before serving.
That's it — you did it. But hold on, I've got a few more tricks that'll take this to another level...
Insider Tricks for Flawless Results
The Temperature Rule Nobody Follows
Many bakers set their ovens to a standard 350°F, but this pudding thrives at a slightly lower temperature of 325°F. Baking at 325°F allows the custard to set evenly without drying out the banana layers. I’ve tested both temperatures, and the lower heat delivers a more tender, custard‑like interior. Remember to use an oven thermometer to ensure accurate heat.
Why Your Nose Knows Best
The aroma is the ultimate indicator of readiness. As the pudding bakes, a sweet, buttery scent will rise, signaling that the custard is near completion. If you notice a faint, sweet smell but the center still feels runny, give it a few more minutes. Trust your nose; it’s a reliable guide to avoid over‑baking.
The 5‑Minute Rest That Changes Everything
After removing the pudding from the oven, let it rest on the counter for 5 minutes before chilling. This short rest allows the batter to set further, preventing the pudding from collapsing when it cools. It also lets the flavors meld, creating a smoother, more cohesive taste.
Use a Silicone Baking Dish
A silicone baking dish ensures even heat distribution and a non‑stick surface, making it easier to remove the pudding once it’s set. The flexibility of silicone also allows you to press the edges to create a uniform crust. I’ve found that silicone dishes reduce the risk of over‑browning at the bottom.
Add a Splash of Water When Reheating
If you need to reheat the pudding, add a splash of water before microwaving. The water steams the custard, restoring moisture and preventing it from drying out. A quick 30‑second burst in the microwave followed by a minute of resting will bring the pudding back to its silky glory.
Freeze for Future Indulgence
This pudding freezes beautifully in portioned containers. Freeze for up to 2 months, then thaw overnight in the fridge. Reheat in the microwave with a splash of water or warm in the oven at 300°F for 10 minutes. The texture remains smooth, and the banana flavor stays vibrant.
Creative Twists and Variations
This recipe is a playground. Here are some of my favorite ways to switch things up:
Peanut Butter Swirl
Stir in a tablespoon of creamy peanut butter into the batter before baking. The nutty flavor pairs perfectly with the banana, adding a new dimension of richness. Top with a drizzle of peanut butter after chilling for an extra indulgent touch.
Matcha Infusion
Add 1 tsp matcha powder to the dry mix for a subtle green tea flavor and a vibrant color. The earthy undertone balances the sweetness, making it a sophisticated dessert. Serve with a sprinkle of matcha dust for a finishing touch.
Coconut Cream Topping
Whip coconut cream with a little maple syrup and fold it into the batter before baking. The coconut cream adds a luxurious, tropical layer that enhances the overall mouthfeel. Garnish with toasted coconut flakes for a crunchy finish.
Espresso Shot
Incorporate a shot of cold espresso into the batter for a bold coffee kick. The espresso deepens the chocolate notes from the cacao powder, creating a mocha‑like flavor. This variation is perfect for coffee lovers looking for a sweet treat.
Dark Chocolate Ganache
Melt dark chocolate and swirl it into the cooled pudding before serving. The ganache adds a silky, velvety texture and a deep chocolate flavor. Dust the top with cocoa powder for a sophisticated finish.
Lemon Zest
Grate the zest of one lemon into the batter for a bright, citrusy note that cuts through the sweetness. The lemon zest adds a refreshing contrast that makes the pudding feel lighter. Finish with a sprinkle of lemon zest on top for an aromatic flourish.
Storing and Bringing It Back to Life
Fridge Storage
Store the pudding in an airtight container in the refrigerator for up to 5 days. The custard will firm up, making it easier to slice or serve with a spoon. Keep it covered to prevent it from absorbing odors from other foods.
Freezer Friendly
Divide the pudding into individual portions and place each in a freezer‑safe container. Freeze for up to 2 months. When ready to serve, thaw overnight in the refrigerator. The texture remains smooth, and the banana flavor stays vibrant.
Best Reheating Method
To reheat, add a splash of non‑dairy milk or water to the pudding, then microwave on medium for 30‑second bursts, stirring between intervals. Alternatively, place the whole container in a preheated oven at 300°F for 10 minutes. The added liquid keeps the custard moist and restores its silky texture.