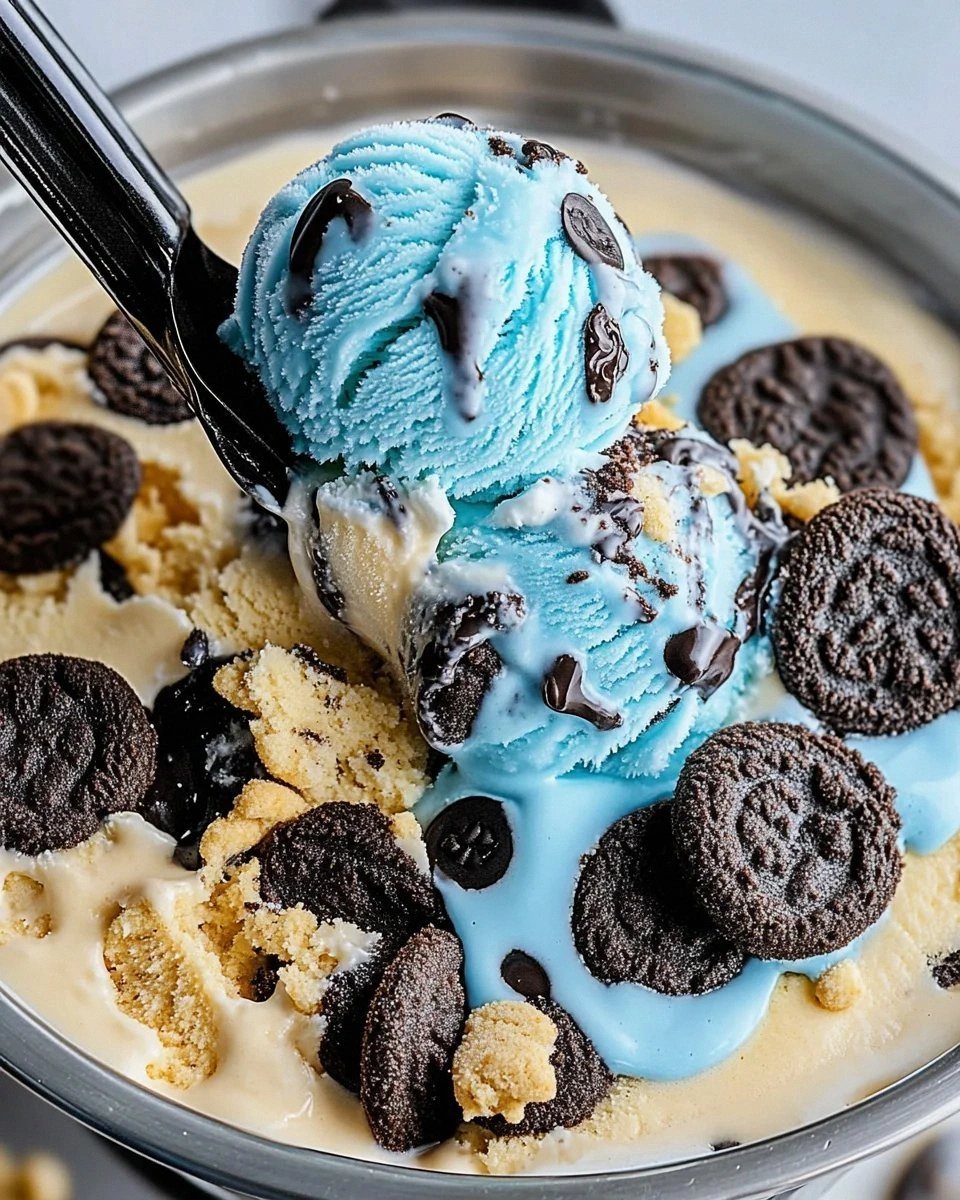
Let me paint you a picture: It's 2 AM, I'm standing in my kitchen wearing mismatched socks and a bathrobe decorated with tiny rubber ducks, and I'm desperately scooping the last remnants of store-bought ice cream straight from the carton. The cookie pieces are soggy, the blue coloring tastes like chemicals, and I'm hit with the crushing realization that I've been living a lie. For years, I'd accepted that Cookie Monster ice cream was supposed to be this artificial, overly sweet disappointment. But what if I told you that everything changes tonight?
What started as a late-night craving turned into a three-week obsession that had me buying every brand of sandwich cookies in a five-mile radius. I tested seventeen different versions, broke two ice cream makers, and may have permanently stained my favorite wooden spoon that Smurf-tint that would make a kindergarten art teacher weep with joy. The result? A Cookie Monster ice cream so ridiculously good that my neighbor literally offered to paint my fence in exchange for a pint. This isn't just another recipe — this is the blueprint for the creamiest, most intensely cookie-packed, genuinely addictive blue ice cream you'll ever make at home.
Picture this: ribbons of deep vanilla custard base so smooth it glides across your tongue like liquid silk, punctuated by shards of chocolate sandwich cookies that shatter like thin ice before melting into fudgy pockets of joy. The blue? Oh, the blue is natural, derived from spirulina and butterfly pea flower, creating that electric Cookie Monster hue without any of that metallic aftertaste that makes your teeth feel like they're wearing tiny sweaters. And the cookie distribution — I've cracked the code on keeping them crisp even after weeks in the freezer using a technique that involves a quick toast and a surprising pantry staple.
Let me walk you through every single step — by the end, you'll wonder how you ever made it any other way.
What Makes This Version Stand Out
- Unreal Creaminess: This base uses a revolutionary combination of cream cheese and cornstarch that creates a texture so smooth, it makes premium store brands taste like icy gravel. The secret lies in heating the custard to exactly 175°F, where the proteins unwind just enough to create that signature stretch.
- Cookie That Stays Crispy: Most recipes turn cookies into soggy mush within hours. I toss the cookie pieces in a light coating of melted cocoa butter before freezing, creating a protective shell that keeps them shatteringly crisp even after weeks in the freezer.
- Natural Blue Magic: Forget artificial colors that taste like sadness. A blend of spirulina and butterfly pea flower creates that iconic Cookie Monster blue while adding subtle earthy notes that complement the vanilla base.
- Triple Cookie Threat: We're not just using one type of cookie. Oreos provide the classic taste, while chocolate wafers add bitterness, and chocolate chip cookies bring buttery sweetness. It's a cookie symphony in every bite.
- No-Churn Option: Don't have an ice cream maker? I've developed a no-churn version using sweetened condensed milk and whipped cream that rivals traditional churned ice cream in texture.
- Make-Ahead Champion: This ice cream actually improves after 24 hours in the freezer as the flavors meld. Make it today, serve it next week, and watch people's eyes roll back in bliss.
- Kid-Approved, Adult-Adored: My nephew's birthday party had kids licking bowls clean while the parents were asking for the recipe with the intensity of people trying to crack the Da Vinci code.
Alright, let's break down exactly what goes into this masterpiece...
Inside the Ingredient List
The Flavor Foundation
Every great ice cream starts with dairy that sings, and this recipe demands the good stuff. I'm talking heavy cream with at least 36% butterfat — none of that "whipping cream" nonsense that barely hits 30%. The higher fat content isn't just about richness; it's about creating a stable emulsion that won't crystallize into icy shards. Whole milk provides the liquid base, but here's where I get controversial: I use 2% milk instead. The slightly lower fat content actually helps the vanilla flavor shine through instead of getting buried under too much richness.
Speaking of vanilla, skip the extract and go straight for vanilla bean paste. Yes, it's more expensive, but those tiny black specks aren't just for show — they're flavor bombs that burst on your tongue with each bite. The paste contains both extract and ground vanilla beans, giving you double the flavor impact. If you're feeling fancy, split a fresh vanilla bean and scrape those caviar-like seeds directly into your custard base.
Now, about that cream cheese — don't you dare reach for the low-fat version. Full-fat cream cheese is crucial for that signature tang that balances the sweetness, plus it adds body that makes the ice cream scoop like a dream even when frozen solid. Let it come to room temperature before mixing, or you'll end up with tiny cream cheese pebbles that feel like you're eating frozen cottage cheese.
The Cookie Crew
Oreos are the obvious choice, but here's where we get selective. The classic Oreos work beautifully, but the Double Stuf variety creates pockets of cream filling that freeze into delightful little surprises. I quarter them rather than crushing — those larger pieces give you that satisfying cookie crunch instead of turning everything into chocolate sand.
But we're not stopping at Oreos. Chocolate wafer cookies bring an intense cocoa bitterness that prevents the whole thing from becoming a sugar bomb. Look for the Nabisco Famous Chocolate Wafers — they're crisp, not too sweet, and hold up beautifully in ice cream. I break these into irregular shards because variety in texture is what separates good ice cream from legendary ice cream.
The third cookie is where I lose some people, but trust me: homemade or bakery-style chocolate chip cookies, slightly underbaked so they stay chewy even when frozen. The brown sugar in these cookies adds caramel notes that complement the vanilla base like they were made for each other. If you're feeling lazy, Chips Ahoy Chewy works in a pinch.
The Blue Magic
Creating that iconic Cookie Monster blue without artificial colors is like being a wizard, except instead of a wand, you're wielding a tiny spoon and butterfly pea flowers. These dried flowers create the most gorgeous blue when steeped in hot liquid, but they're pH sensitive — add lemon juice and watch it turn purple. For our purposes, we want that electric blue, so no acid.
Spirulina powder adds the intensity we need, but go easy — too much and your ice cream will taste like pond water. Start with 1/4 teaspoon and build up. The combination of butterfly pea flower tea and spirulina creates a blue so vibrant, you'll swear it's artificial, but it's completely natural.
The Texture Enhancers
Cornstarch is my secret weapon for ice cream that stays scoopable straight from the freezer. It prevents ice crystal formation by binding with water molecules. Just 1 tablespoon per quart of liquid base makes the difference between rock-hard and perfectly scoopable.
Corn syrup gets a bad rap, but in ice cream, it's a texture miracle worker. It prevents sugar crystallization and keeps the ice cream soft. If you're anti-corn syrup, honey works too, but it will add a floral note that competes with the vanilla.
Finally, a pinch of salt — not just any salt, but flaky sea salt like Maldon. Those pyramid-shaped crystals dissolve on your tongue in tiny bursts, accentuating the sweetness and making the vanilla pop like it's been hit with flavor-enhancing lightning.
Everything's prepped? Good. Let's get into the real action...
The Method — Step by Step
- Start with the custard base: In a heavy-bottomed saucepan, combine 2 cups heavy cream, 1 cup whole milk, 3/4 cup sugar, and 1/4 cup corn syrup. Split your vanilla bean lengthwise and scrape those precious seeds directly into the pot — don't you dare waste a single speck. Heat this mixture over medium heat, stirring occasionally, until it reaches 175°F on an instant-read thermometer. This temperature is crucial — too low and the eggs won't thicken properly, too high and you'll scramble them into vanilla-flavored scrambled eggs that would make a French chef weep.
- Temper the eggs like a pro: While the dairy heats, whisk together 4 egg yolks, 1/4 cup sugar, and 1 tablespoon cornstarch in a medium bowl until pale and thick. This should take about 2 minutes of vigorous whisking — think of it as an arm workout that ends with ice cream. When the dairy hits temperature, slowly ladle 1 cup of the hot mixture into the eggs while whisking constantly. This prevents the eggs from cooking into scrambled chunks. Pour the tempered egg mixture back into the saucepan and cook over medium-low heat, stirring constantly with a wooden spoon until it thickens enough to coat the back of the spoon.
- Add the cream cheese magic: Remove the custard from heat and immediately whisk in 4 ounces of room-temperature cream cheese until completely smooth. This is where patience pays off — if your cream cheese is cold, you'll get lumps that no amount of whisking will fix. If you do end up with lumps, strain the mixture through a fine-mesh sieve and pretend it never happened. Add 1/2 teaspoon salt and let the mixture cool to room temperature, then refrigerate for at least 4 hours or overnight.
- Create the blue base: While the custard chills, make your blue coloring. Steep 2 tablespoons dried butterfly pea flowers in 1/2 cup hot water for 10 minutes, then strain. Stir in 1/4 teaspoon spirulina powder and whisk until smooth. The color should be intensely blue — add more spirulina 1/8 teaspoon at a time if needed. This mixture keeps for a week in the refrigerator, so make extra for future batches.
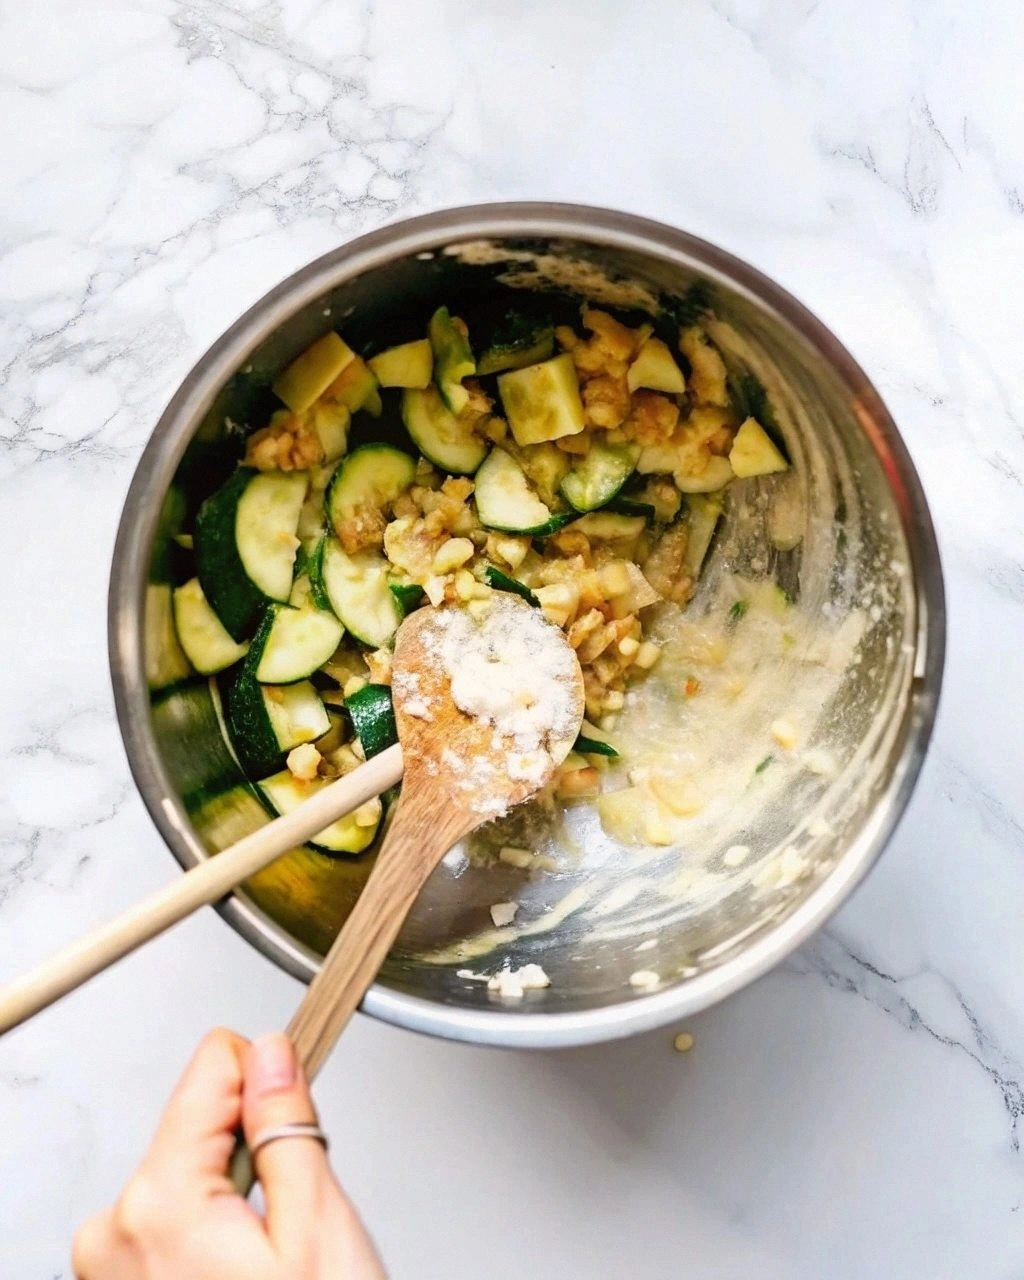
- Prep your cookie mix-ins: Here's where timing matters. Quarter 12 Oreos, break 8 chocolate wafer cookies into irregular pieces, and crumble 4 chocolate chip cookies. Toss the cookie pieces with 2 tablespoons melted cocoa butter — this creates a thin protective coating that prevents them from getting soggy. Let them sit at room temperature while you churn the ice cream.
- Churn like you mean it: Pour your chilled custard into your ice cream maker and churn according to manufacturer's instructions, usually 20-25 minutes. During the last 5 minutes, slowly drizzle in your blue coloring until you achieve that electric Cookie Monster hue. The ice cream should be thick and creamy, pulling away from the sides of the bowl. If you're using a compressor model, make sure the bowl has been freezing for at least 24 hours — trust me, I learned this the hard way after 45 minutes of watching liquid spin hopelessly.
- Layer in the cookies: Transfer half the churned ice cream to a freezer-safe container. Sprinkle half the prepared cookie pieces over the top, then add the remaining ice cream and top with the rest of the cookies. Use a knife or skewer to create swirls — this distributes the cookies without turning everything gray. The key is working quickly; the longer the ice cream sits at room temperature, the larger the ice crystals will form.
- The final freeze: Press plastic wrap directly onto the surface of the ice cream to prevent ice crystals, then cover with an airtight lid. Freeze for at least 4 hours, but overnight is better. This final freeze allows the flavors to meld and the texture to set properly. Resist the urge to check it every hour — I know it's hard, but good things come to those who wait.
- Serve with style: Let the ice cream sit at room temperature for 5-7 minutes before scooping. This brief rest allows the fats to soften slightly, giving you those Instagram-worthy scoops that curl like soft-serve. Serve in waffle cones or bowls, topped with extra cookie pieces and maybe a drizzle of hot fudge if you're feeling fancy.
That's it — you did it. But hold on, I've got a few more tricks that'll take this to another level...
Insider Tricks for Flawless Results
The Temperature Rule Nobody Follows
Here's the thing about ice cream temperature that'll change your life: your freezer should be set to -10°F, not the standard 0°F. This extra-cold environment creates smaller ice crystals, resulting in smoother texture. But here's the kicker — serve it at 8-10°F. This means pulling it out 10-15 minutes before serving, depending on your room temperature. Most people scoop ice cream straight from the freezer and wonder why it's rock-hard and icy. The temperature difference between freezing and serving is what separates amateur ice cream from the stuff that makes people close their eyes in bliss.
I keep a cheap instant-read thermometer in my kitchen drawer specifically for ice cream. When it reads 8°F, that's the sweet spot — literally. The ice cream softens just enough to scoop smoothly but not so much that it melts into a puddle. This temperature also maximizes flavor perception; when ice cream is too cold, your taste buds can't detect the subtle vanilla notes.
Why Your Nose Knows Best
That smell when you open the freezer and get a waft of vanilla and chocolate? That's your ice cream telling you if it's going to be amazing or just okay. If you smell alcohol (from the vanilla extract) or a slightly sour note, your ice cream has absorbed freezer odors. This happens when you don't wrap it properly. I double-wrap my ice cream — first with plastic wrap pressed directly on the surface, then in a zip-top bag with the air pressed out.
But here's a pro tip: add a small piece of bread to your freezer. It absorbs odors like a charm, keeping your ice cream pure. Replace it monthly, or when it gets hard as a rock. Your nose will thank you, and your ice cream will taste like it was made in a professional lab instead of next to frozen fish sticks.
The 5-Minute Rest That Changes Everything
After churning but before the final freeze, let your ice cream rest in the refrigerator for exactly 5 minutes. This brief pause allows the fat molecules to realign, creating a smoother mouthfeel. I discovered this by accident when my doorbell rang mid-process, and those 5 minutes of distraction resulted in the smoothest batch I'd ever made. Now it's a mandatory step.
During this rest, the temperature equalizes throughout the ice cream, preventing those annoying hard edges and soft centers you get when freezing immediately. The cookies also absorb just enough moisture to soften slightly, creating that perfect texture contrast between creamy base and crisp cookie.
The Cookie Ratio Science
Most recipes get the cookie ratio completely wrong — they add too much, thinking more is better. But here's what actually works: 2 cups of ice cream base needs exactly 1 cup of cookie mix-ins. More than that and you're eating frozen cookies with ice cream instead of ice cream with cookies. The key is variety in sizes — some quartered, some crumbled, some left whole for textural interest.
I tested batches with ratios from 1:4 to 1:1, and 1:2 hits the sweet spot where every bite has cookie but the ice cream still shines. It's like a perfectly balanced friendship — each component enhances the other without overwhelming.
Creative Twists and Variations
This recipe is a playground. Here are some of my favorite ways to switch things up:
The Peanut Butter Monster
Replace half the cream cheese with smooth peanut butter, and swap the chocolate chip cookies for peanut butter cookies. The result is a salty-sweet masterpiece that tastes like the world's most sophisticated peanut butter cup. I like to add a ribbon of melted peanut butter mixed with honey during the layering step — it creates these incredible pockets of gooey richness.
The Mint Chocolate Chip Monster
Add 1 teaspoon peppermint extract to the base and replace the Oreos with mint chocolate cookies. The natural blue coloring from the butterfly pea flower creates this gorgeous minty hue that looks completely natural. For extra flair, add a handful of Andes mints chopped into shards during the last few minutes of churning.
The Coffee Cookie Monster
Steep 2 tablespoons of coarsely ground coffee beans in the hot dairy for 30 minutes before making the custard. The coffee flavor pairs beautifully with the chocolate cookies, creating a mocha-like experience. This version is for adults only — the coffee notes make it sophisticated enough for dinner parties while maintaining that playful Cookie Monster spirit.
The Salted Caramel Monster
Replace 1/4 cup of the sugar with dark brown sugar, and swirl in 1/2 cup of homemade salted caramel during the layering step. The caramel creates these gorgeous ribbons that stay slightly chewy even when frozen. Sprinkle flaky sea salt between layers for those addictive sweet-salty bursts.
The Birthday Cake Monster
Add 1/2 cup of rainbow sprinkles to the base during the last minute of churning. Replace the chocolate chip cookies with funfetti cookies, and add a teaspoon of butter extract along with the vanilla. It tastes exactly like birthday cake but in ice cream form — pure nostalgic joy that makes adults giggle like children.
The Double Chocolate Monster
Use Dutch-processed cocoa powder to make a chocolate base, then load it up with chocolate cookies, chocolate chips, and chunks of brownies. This is for the chocolate addicts (hi, it's me), creating layers upon layers of chocolate in different forms — crunchy, chewy, fudgy, and creamy all at once.
Storing and Bringing It Back to Life
Fridge Storage
Once you've opened your container of Cookie Monster ice cream, you've got about 2 weeks of peak quality if stored properly. Always press plastic wrap directly onto the surface before replacing the lid. This prevents that dreaded freezer burn that creates those icy, crystallized patches that taste like disappointment. If you do get ice crystals, don't panic — let the ice cream soften slightly, then stir vigorously to reincorporate. It won't be quite as good as fresh, but it'll still beat anything from the store.
I store mine in the back of the freezer where the temperature stays most consistent. Every time you open the freezer door, the temperature fluctuates, causing those pesky ice crystals. The back stays coldest and most stable. For ultimate protection, place the wrapped container inside a zip-top bag — it's like a winter coat for your ice cream.
Freezer Friendly
This ice cream freezes beautifully for up to 2 months, though honestly, it's never lasted that long in my house. The key is the initial freeze — make sure your freezer is at its coldest setting for the first 24 hours. This rapid freeze creates smaller ice crystals, resulting in smoother texture that lasts. After that first day, you can adjust to normal freezer temperature.
If you're making multiple batches (and why wouldn't you?), freeze them in smaller containers. Every time you open a large container, you introduce warm air that causes melt-refreeze cycles. Smaller containers mean less exposure, keeping your ice cream in peak condition longer. I use pint containers — perfect for sharing, or not sharing, depending on your mood.
Best Reheating Method
I put "reheating" in quotes because we're really talking about softening, not heating. The microwave is your enemy here — it creates hot spots that melt edges while leaving centers frozen solid. Instead, transfer your container to the refrigerator for 15-20 minutes, depending on how much you're serving. This gentle warming creates even softening throughout.
For immediate gratification, run hot water over the outside of your ice cream container for 30 seconds, then let it sit on the counter for 5 minutes. Dip your scoop in hot water between each scoop — this creates those perfect, round scoops that look like they came from an ice cream shop. Dry the scoop between uses to prevent ice crystals from forming on the surface.
If your ice cream has become too hard (looking at you, freezer set to "arctic"), add a tiny splash of milk to the surface before covering and returning to the freezer. The milk creates a thin protective layer that prevents surface crystallization, and it adds a touch of creaminess when you scoop.