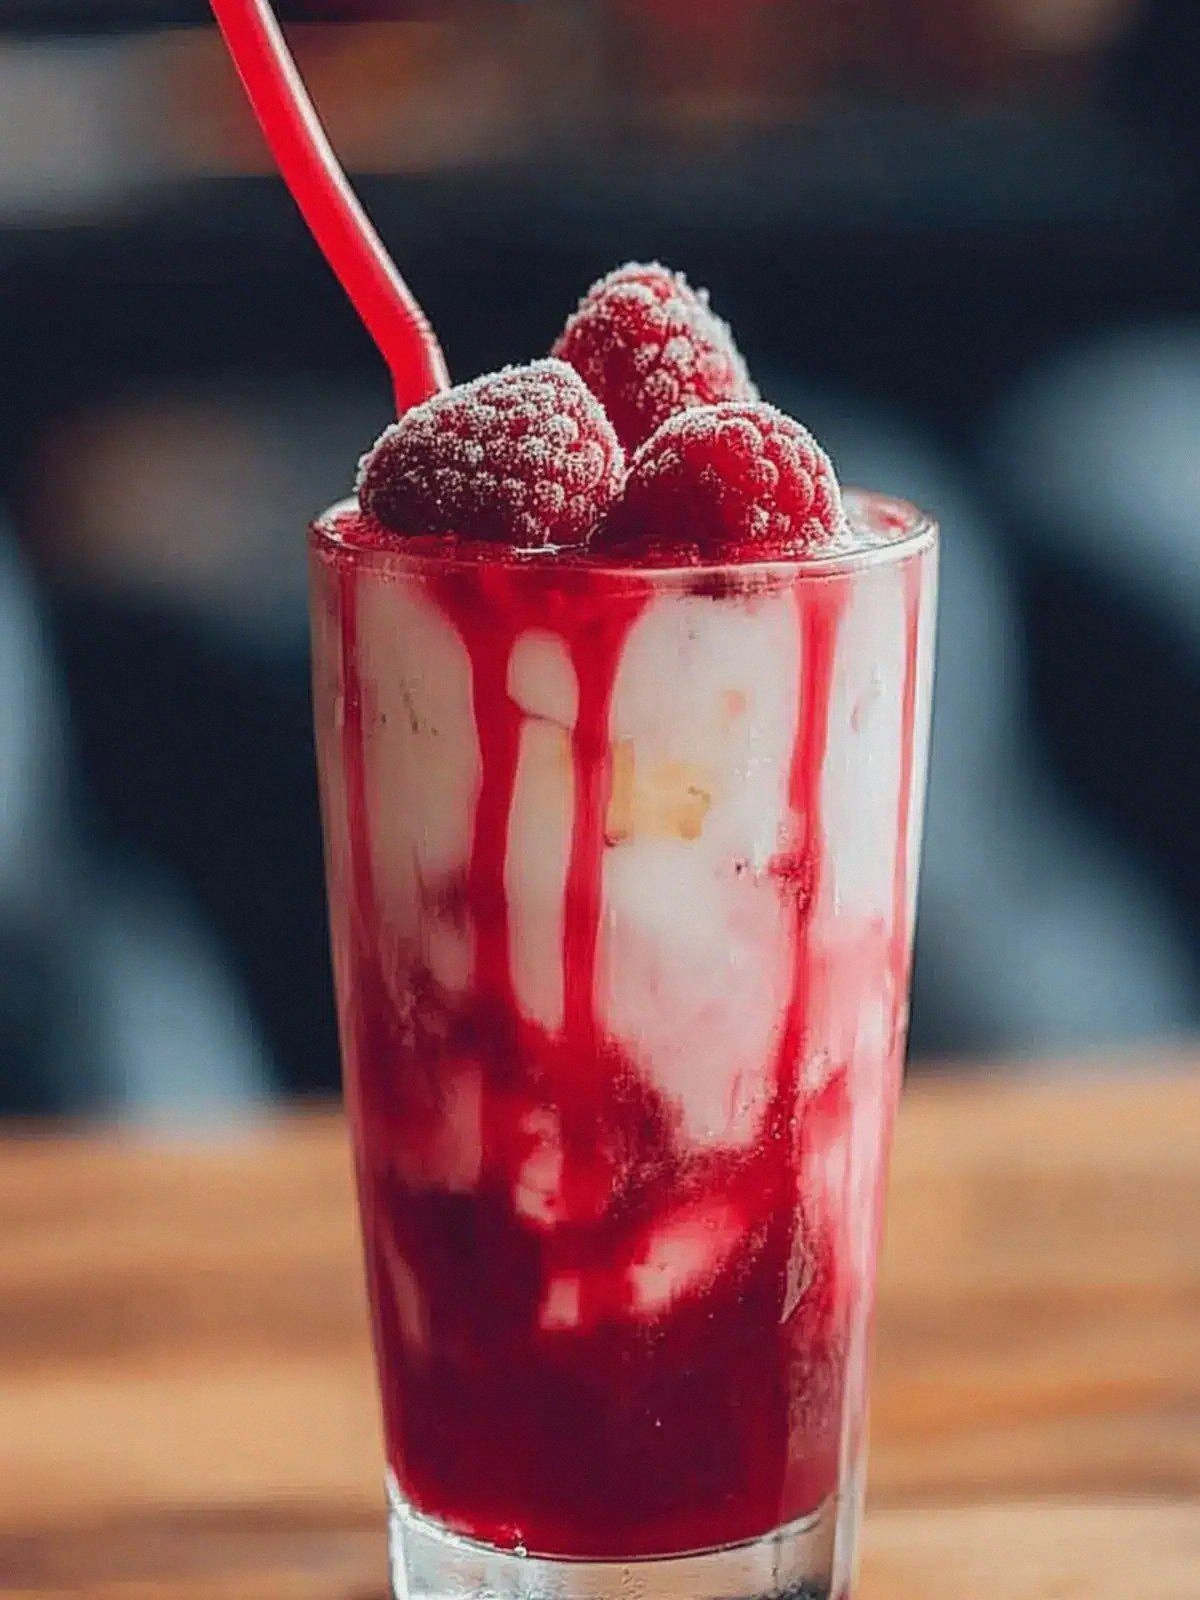
I was in the middle of a family gathering, the kitchen a whirlwind of sugar, steam, and a half‑finished batch of cupcakes that had turned into a sticky mess. The timer beeped, the oven door opened, and I realized the cupcakes were a disaster. I felt the sting of disappointment, but the craving for something sweet persisted like an unquenchable fire. That moment sparked the idea for a new dessert that could save the day and wow everyone.
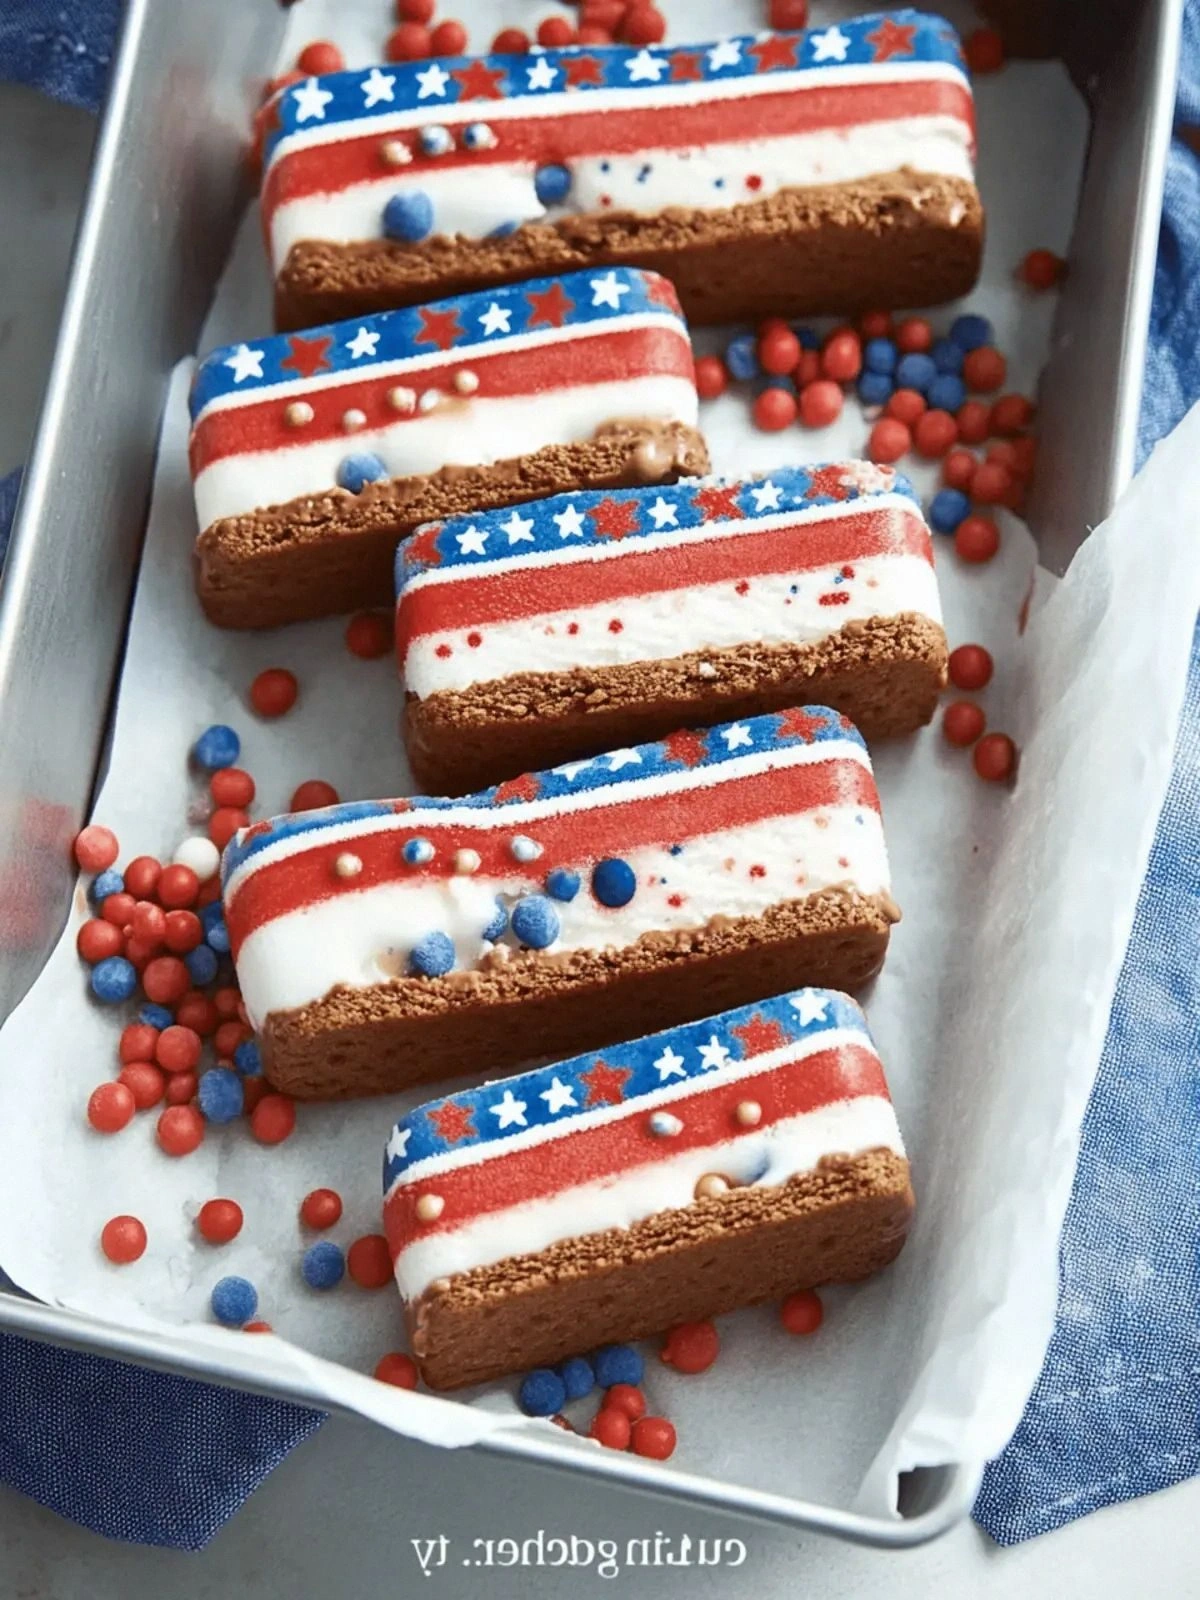
The air was thick with the scent of vanilla and toasted sugar, the sound of laughter bouncing off the walls, and the gentle hum of the refrigerator. My fingers tingled on the countertop as I imagined a crisp, buttery crust meeting silky ice cream. The sight of a glistening, colorful sprinkle swirl on a frozen sandwich made my heart race. The taste of that first bite would be a burst of patriotic flavor that felt like fireworks in my mouth.
What makes this version stand out is that it turns ordinary ice cream into a celebratory, crowd‑pleasing treat that can be made in minutes. It combines the crunch of a freshly baked cookie with the chill of ice cream, creating a contrast that feels like a summer fireworks show. The recipe is simple, but the result is a masterpiece that will leave your guests begging for seconds. I dare you to taste this and not go back for seconds.
The secret ingredient is a container of red, white, and blue sprinkles that I discovered in my pantry after a trip to a local craft store. Adding them to the finished sandwiches gives a pop of color and a subtle crunch that elevates the entire experience. I’ll be honest — I ate half the batch before anyone else got to try it. Picture yourself pulling this out of the oven, the whole kitchen smelling incredible, and the moment when you take the first bite.
Let me walk you through every single step — by the end, you’ll wonder how you ever made it any other way. I’ll be your side‑by‑side guide, pointing out the pitfalls and celebrating the triumphs. The journey from a simple idea to a festive dessert is packed with flavor, texture, and a dash of patriotic flair. Ready? Let’s dive in.
What Makes This Version Stand Out
- Texture: The sandwich starts with a buttery, slightly crisp crust that gives way to a creamy center. The crunch is achieved through a quick bake that caramelizes the sugar on the surface, creating a golden edge that shatters like thin ice when you bite. This duality of textures keeps the mouth moving and adds excitement to each bite.
- Flavor: Vanilla ice cream is the base, but the sprinkles add a subtle, sweet pop of color and flavor that echoes the national colors. The buttery crust brings a mellow, toasted note that balances the sweetness of the ice cream. The result is a harmonious blend that feels like a patriotic celebration in your mouth.
- Simplicity: The recipe requires no fancy equipment or hard‑to‑find ingredients. All you need is a standard oven, a baking sheet, and a few pantry staples. The steps are straightforward, making this a perfect go‑to recipe for busy cooks or beginners.
- Make‑Ahead: Once assembled, the sandwiches can sit in the freezer for up to a week, making them ideal for parties or last‑minute dessert plans. They thaw quickly in the fridge, retaining their crispness and flavor. This flexibility sets them apart from other ice‑cream‑based desserts that must be served immediately.
- Visual Appeal: The red, white, and blue sprinkles create a striking visual that is perfect for themed parties or patriotic celebrations. The contrast between the golden crust and the colorful sprinkles is Instagram‑ready. This visual element turns an ordinary dessert into a showstopper.
- Audience: Everyone loves ice cream, but this recipe adds a twist that makes it memorable. Kids will be drawn to the colorful sprinkles, while adults will appreciate the buttery crust. The result is a dessert that satisfies all age groups and dietary preferences.
Inside the Ingredient List
The Flavor Base
The flavor base consists of the ice cream that will be sandwiched between two cookie layers. The vanilla ice cream I use is a high‑fat, premium brand that holds its shape even when frozen. If you prefer a different flavor, such as chocolate or strawberry, you can swap it out without altering the rest of the recipe. The key is to use a thick, creamy ice cream that won’t melt too quickly.
The ice cream’s fat content is crucial; it prevents the sandwich from becoming soggy during the baking process. A lower‑fat ice cream will release more water, causing the crust to become sticky. I recommend using a 30% fat content for the best balance of flavor and texture. The result is a sandwich that feels indulgent and satisfying.
If you’re on a diet, you can opt for a low‑calorie ice cream, but be prepared for a slightly different mouthfeel. The lower fat will produce a less creamy center, but the buttery crust will still provide the necessary crunch. Experimenting with flavors can turn this recipe into a personalized dessert experience.
The Texture Crew
The texture crew includes the cookie dough, which forms the sandwich’s outer shell. I use a simple shortbread dough that’s buttery and slightly sweet. This dough is rolled thin so that it crisps up quickly without overbaking. The result is a delicate, flaky layer that cradles the ice cream.
To achieve the perfect crispness, I bake the dough at a high temperature for a short time. This caramelizes the sugars on the surface, giving the crust a golden color and a satisfying crunch. The short baking time also prevents the dough from drying out, keeping it tender on the inside.
If you’re vegan or have dietary restrictions, you can replace the butter with coconut oil or a plant‑based butter substitute. The texture will be slightly different but still enjoyable. The key is to keep the fat content high enough to create a buttery flavor profile.
The Unexpected Star
The unexpected star is the container of red, white, and blue sprinkles. This colorful addition turns an ordinary sandwich into a festive masterpiece. The sprinkles add a subtle crunch and a pop of color that is visually striking.
Sprinkles are more than just a decorative element; they contribute to the overall texture profile. The small, crunchy pieces create a delightful contrast when combined with the buttery crust and creamy ice cream. They also add a playful, celebratory feel that is perfect for themed parties.
If you can’t find the exact color combination, you can use a mix of rainbow sprinkles for a more whimsical look. The texture remains the same, but the visual impact changes. This flexibility allows you to adapt the recipe to your own aesthetic preferences.
The Final Flourish
The final flourish is the assembly process, which turns the individual components into a cohesive dessert. I carefully spread a thin layer of softened butter between each cookie to help seal the sandwich and create a crisp crust. The butter also adds a subtle richness that balances the sweetness of the ice cream.
After assembling, I place the sandwiches on a baking sheet lined with parchment paper. The parchment prevents sticking and allows the heat to circulate evenly around the sandwich, ensuring a uniform golden crust. The baking process takes only a few minutes, making this recipe quick and efficient.
Once baked, I let the sandwiches cool slightly before adding the sprinkles. The sprinkles stick to the warm surface, creating a vibrant, textured topping. This final step is crucial for achieving the visual and sensory impact that makes this recipe unforgettable.
Everything's prepped? Good. Let's get into the real action.
The Method — Step by Step
- Step 1: Preheat and Prep. Set your oven to 375°F (190°C) and line a baking sheet with parchment paper. While the oven heats, roll out your cookie dough to about 1/8 inch thickness. The dough should be smooth and even, ready to be cut into shapes.
- Step 2: Cut and Shape. Use a cookie cutter or a glass to cut out the dough into small, bite‑size shapes that will fit around each ice cream sandwich. Ensure the shapes are uniform so they bake evenly. This step is critical for a consistent final product.
- Step 3: Butter the Edge. Lightly brush the cut dough with softened butter to help seal the sandwich and create a golden crust. The butter adds flavor and prevents the ice cream from leaking during baking. Kitchen Hack: Melt a small amount of butter with a pinch of salt to create a glaze that enhances the crust’s flavor. This simple addition gives a savory undertone that balances the sweetness.
- Step 4: Assemble the Sandwich. Place an ice cream sandwich on each buttered dough shape, pressing gently to ensure the edges stick together. The ice cream should be slightly softened so it can adhere to the dough without melting. This assembly is the heart of the recipe.
- Step 5: Bake to Perfection. Slide the assembled sandwiches onto the prepared baking sheet and bake for 6-8 minutes, or until the crust is golden and the edges are crisp. Keep a close eye on the baking time; overbaking will dry out the crust. Watch Out: Do not leave the sandwiches in the oven too long, or the butter will burn and create a bitter taste. The ideal time is a quick burst that caramelizes the sugar without overcooking.
- Step 6: Cool Slightly. Remove the sandwiches from the oven and let them rest on a wire rack for 3-4 minutes. The cooling time allows the crust to set and makes the sandwiches easier to handle. This brief pause is essential for texture.
- Step 7: Sprinkle with Color. While the crust is still warm, generously dust the top with the red, white, and blue sprinkles. The warmth helps the sprinkles adhere, creating a vibrant, crunchy topping. Kitchen Hack: Toss the sprinkles in a little sugar before adding them to enhance the crunch and sweetness. This small tweak elevates the overall flavor profile.
- Step 8: Chill for a Minute. Place the freshly sprinkled sandwiches back in the freezer for 5-7 minutes to set the crust and the ice cream. This quick chill locks in the flavors and ensures the sandwich stays firm until serving.
- Step 9: Serve with Pride. Arrange the sandwiches on a platter and serve immediately. The contrast of hot crust and cold ice cream is a sensory delight that will impress anyone. This step is where the magic happens.
- Step 10: Enjoy and Share. Take a bite and let the buttery crust melt into the creamy ice cream, followed by the pop of sprinkles. The experience is a celebration of flavor, texture, and color. This final step is pure joy.
That’s it — you did it. But hold on, I’ve got a few more tricks that will take this to another level.
Insider Tricks for Flawless Results
The Temperature Rule Nobody Follows
Many cooks assume room temperature ice cream is fine for baking, but the key is to let it soften just enough that it’s pliable but still cold. If the ice cream melts too quickly, the crust will become soggy. I recommend chilling the sandwiches in the freezer for 10 minutes before assembling. This step keeps the ice cream firm and ensures a crisp crust.
Why Your Nose Knows Best
When baking, your nose can tell you when the crust has reached the perfect golden color. The aroma of toasted sugar is a reliable indicator that the sandwich is ready. Trust your senses; don’t rely solely on the timer. This instinctive approach prevents overbaking and ensures a flawless finish.
The 5-Minute Rest That Changes Everything
After removing the sandwiches from the oven, let them rest for exactly 5 minutes before adding sprinkles. This brief pause allows the crust to set and the butter to firm up, creating a more stable base. A friend once skipped this step, and the result was a soggy sandwich that fell apart. Lesson learned.
Use a Silicone Mat for Even Baking
A silicone baking mat ensures that the sandwiches bake evenly and prevents sticking. The mat also makes cleanup a breeze, saving you time and effort. If you don’t have a mat, parchment paper works well, but the mat offers superior heat distribution.
Keep the Sprinkles Fresh
Sprinkles can lose their crunch if left exposed to air. Store them in an airtight container for up to a week. Before using, give them a quick shake to redistribute the colors. Fresh sprinkles add a vibrant crunch that elevates the entire dessert.
Serve with a Side of Condensed Milk
A drizzle of sweetened condensed milk adds a silky, caramelized finish that pairs beautifully with the buttery crust. The condensed milk also balances the sweetness of the ice cream, creating a harmonious flavor profile. This simple addition turns a great dessert into an unforgettable experience.
Creative Twists and Variations
This recipe is a playground. Here are some of my favorite ways to switch things up:
Chocolate‑Covered Delight
Swap the vanilla ice cream for chocolate for a richer, deeper flavor. After baking, dip the sandwiches in melted chocolate and let them set. The chocolate coating adds a glossy finish and a decadent taste that appeals to chocolate lovers.
Berry Burst Edition
Use a strawberry or raspberry ice cream and add fresh berries on top before sprinkling. The fruit adds a natural sweetness and a pop of color that complements the patriotic theme. This version is perfect for summer parties.
Nutty Crunch Variation
Add chopped toasted almonds or walnuts to the cookie dough for an extra layer of crunch. The nuts provide a subtle, earthy flavor that balances the sweetness. This twist is great for guests who enjoy a bit of texture.
Salted Caramel Twist
Replace the butter with salted caramel sauce before baking. The caramel adds a sweet‑salty dimension that elevates the crust. The result is a sophisticated dessert that’s sure to impress.
Minty Fresh Variation
Infuse the ice cream with fresh mint leaves before freezing. The mint adds a refreshing note that pairs well with the buttery crust. This version is ideal for a springtime celebration.
Citrus Zest Surprise
Add a sprinkle of orange or lemon zest to the cookie dough for a citrusy brightness. The zest provides a lively, aromatic flavor that cuts through the richness. This twist brings a lively, seasonal touch to the dessert.
Vegan Version
Use a dairy‑free ice cream and replace butter with coconut oil in the dough. The result is a plant‑based dessert that still delivers on flavor and texture. This variation is perfect for guests with dietary restrictions.
Holiday Spice Edition
Add a pinch of cinnamon, nutmeg, or ginger to the cookie dough for a warm, spicy undertone. The spices complement the sweet ice cream and create a comforting holiday feel. This version is great for winter celebrations.
Storing and Bringing It Back to Life
Fridge Storage
Store the finished sandwiches in an airtight container in the refrigerator for up to 48 hours. The cool temperature keeps the ice cream firm while the crust remains crisp. If you notice the crust softening, place the sandwiches on a wire rack to allow air circulation.
Freezer Friendly
Wrap each sandwich individually in parchment paper before freezing. This prevents the sprinkles from sticking together and maintains the sandwich’s integrity. They can be stored for up to 4 weeks without loss of flavor.
Best Reheating Method
To revive a frozen sandwich, place it on a baking sheet and heat at 350°F (175°C) for 3-4 minutes. Add a tiny splash of water before reheating to steam back to perfection and keep the crust from becoming too hard. This simple trick restores the sandwich’s original texture.