I was standing in my kitchen, staring at a loaf of stale French bread that had been sitting on the counter for a week, when a sudden craving hit me like a lightning bolt. It was that moment when you think, “I need something that turns plain bread into a mouth‑watering masterpiece.” I pulled out my trusty butter, a handful of fresh green onions, and a clove of garlic that had been sitting in my fridge like a silent sentinel. The scent of garlic already began to dance in the air, promising a flavor explosion that would make even the most seasoned bread lover swoon. I was determined to turn that stale loaf into a golden, buttery, aromatic delight that would have people begging for seconds.
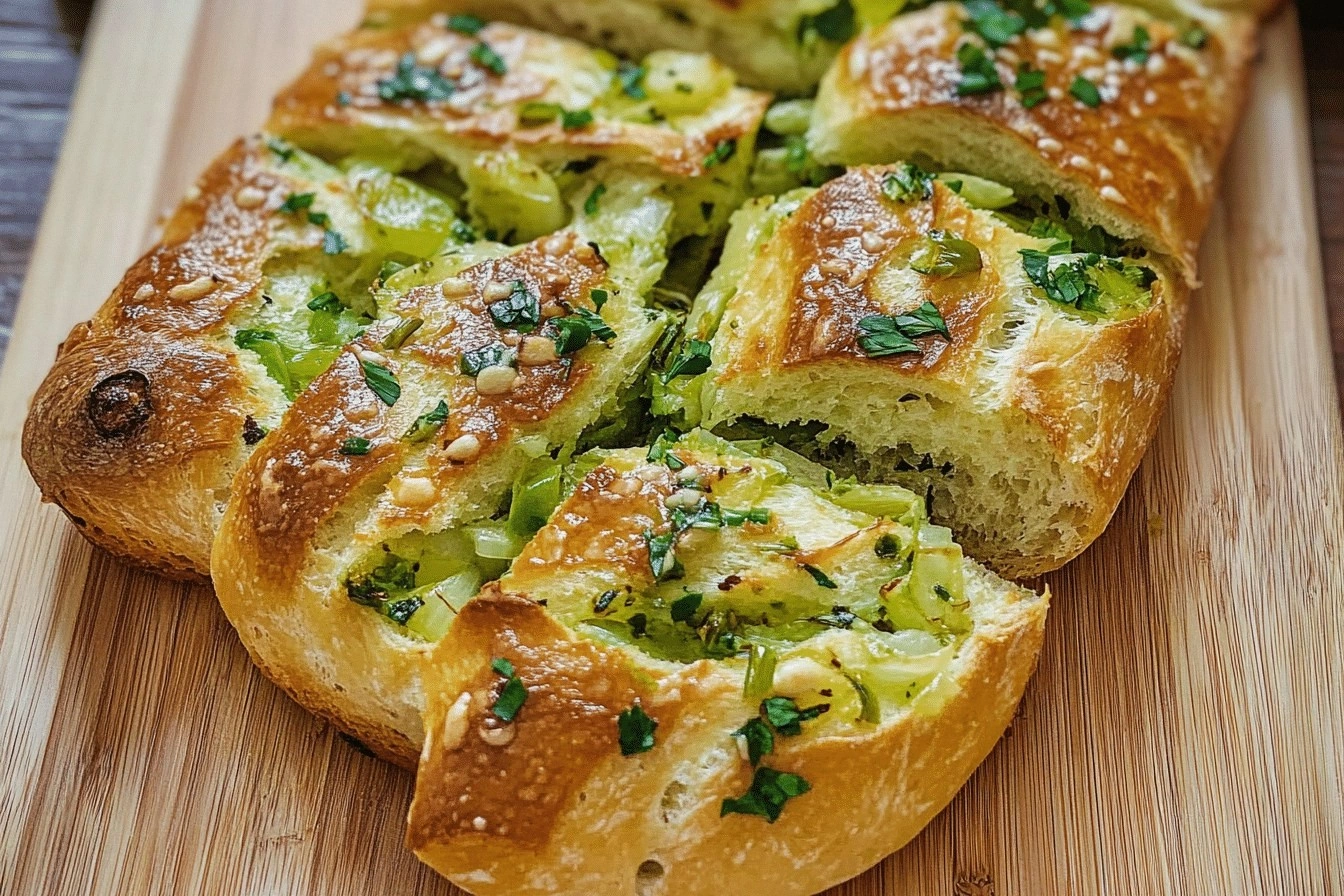
Picture this: you slice the loaf, and the buttery aroma instantly envelops the kitchen. The green onions lend a subtle, almost citrusy bite that cuts through the richness, while the garlic provides a punch that lingers long after the first bite. The crust, when toasted, turns to a crisp, caramelized edge that shatters like thin ice when you bite into it, revealing a tender, fluffy crumb inside. The whole experience feels like a warm hug, with the butter melting into the bread and the onions and garlic swirling around your taste buds. This isn’t just bread; it’s an edible hug, a comfort food that’s both simple and sophisticated.
What sets this version apart is the way each element works in harmony. I’m not just slapping butter on bread; I’m layering flavors, textures, and aromas that elevate a humble loaf into something extraordinary. The fresh green onions bring a bright, green pop that counters the buttery heaviness, while the garlic adds depth and a slight heat that wakes up the palate. The butter is unsalted, allowing me to control the salt level precisely, ensuring that every bite is balanced. I’ve discovered that a small amount of parsley or other herbs at the end gives a fresh, herbal finish that keeps the flavor profile from feeling too heavy. This recipe is hands down the best version you'll ever make at home, and I dare you to taste it and not go back for seconds.
If you’ve ever tried a version that left the bread soggy or the butter too greasy, you’re not alone. Most recipes get this completely wrong, focusing on butter alone and forgetting the green onion’s bright contrast. I’ve cracked the code: a balanced ratio of butter, garlic, and onions, along with a strategic toasting method, turns the bread into a crispy, flavorful masterpiece. Picture yourself pulling this out of the oven, the whole kitchen smelling incredible, and everyone gathering around the counter for a bite. That scent alone can turn a mundane lunch into a memorable event. Let me walk you through every single step — by the end, you'll wonder how you ever made it any other way.
What Makes This Version Stand Out
- Flavor Harmony: Each ingredient is chosen to complement the others, creating a layered taste that evolves with every bite. The buttery richness is tempered by the sharpness of garlic and the bright green of onions.
- Texture Contrast: The crust is crisp and caramelized, while the crumb remains soft and airy. This juxtaposition keeps the eating experience engaging.
- Simple Technique: No fancy equipment or long prep times—just a skillet, a loaf, and a few pantry staples. The method is straightforward yet delivers professional results.
- Ingredient Quality: Using unsalted butter and fresh green onions ensures that the flavors shine without being muddied by excess salt or artificial additives.
- Make‑Ahead Friendly: The bread can be prepared a day ahead, then reheated to perfection. This makes it ideal for busy evenings or small gatherings.
- Crowd‑Pleaser: Whether you’re serving family or friends, the aroma alone will draw people in, and the flavor will keep them coming back for more.
- Versatility: The base can be adapted with different herbs or a splash of lemon zest for a fresh twist. It’s a canvas for creativity.
Alright, let's break down exactly what goes into this masterpiece…
Inside the Ingredient List
The Flavor Base
Fresh Green Onions are the star that adds a bright, almost citrusy bite. When minced finely, they release a subtle sweetness that balances the savory butter. If you skip them, the bread will taste flat and overly greasy. A good rule of thumb: use one medium green onion per loaf to keep the flavor vibrant.
The Texture Crew
Unsalted Butter is the backbone of this recipe. It creates a silky coating that melts into the bread, giving it a luxurious mouthfeel. Because it’s unsalted, you can control the salt level precisely, preventing the bread from tasting too salty. If you don’t have unsalted butter, use salted but reduce the added salt by half.
The Unexpected Star
Garlic Cloves are the secret weapon that brings depth and a slight heat. Minced garlic releases allicin, a compound that adds a sharp, lingering aroma. Too much garlic can overwhelm, so aim for 4 cloves per loaf. If you’re garlic‑averse, reduce to 2 cloves and increase the onion amount.
The Final Flourish
French or Italian Bread provides the perfect canvas. Its crusty exterior holds the buttery mixture, while the soft crumb absorbs the flavors. If you prefer a healthier option, choose a whole‑grain loaf, but be prepared for a slightly denser texture. Salt is essential for seasoning; a half teaspoon is enough to lift all the flavors without overpowering. Optional parsley or other herbs add a fresh, green finish that keeps the bread from feeling too heavy.
Everything's prepped? Good. Let's get into the real action…
The Method — Step by Step
- First, preheat your oven to 375°F (190°C). While the oven warms, slice your loaf into 1.5‑inch thick slices. This thickness ensures the butter and onion mixture will penetrate the bread, not just sit on top. The aroma of toasted bread begins to build even before you add the butter.
- In a small saucepan, melt the unsalted butter over medium heat. Add the minced garlic and cook until the garlic turns golden and fragrant—about 1–2 minutes. Watch closely; garlic burns quickly and turns bitter. The butter should be fragrant, not sizzling.
- Stir in the finely chopped green onions and a pinch of salt. Let the mixture simmer for 30 seconds so the onions soften slightly but still retain their bright color. This step infuses the butter with a subtle onion sweetness that balances the garlic’s sharpness.
- Remove the pan from heat. Using a pastry brush, coat each bread slice with the butter‑onion‑garlic mixture, ensuring every edge gets a generous layer. The coating should be thick enough to keep the bread from drying out during baking.
- Arrange the coated slices on a baking sheet in a single layer. Place the sheet in the preheated oven and bake for 8–10 minutes, or until the edges are crisp and the interior is heated through. Keep an eye on the bread; the butter can brown quickly.
- Once baked, remove the bread from the oven and sprinkle freshly chopped parsley or your herb of choice over the top. The herb adds a burst of green freshness that cuts through the buttery richness.
- Let the bread rest for 2 minutes on a wire rack. This brief pause allows the steam to escape, preventing sogginess and maintaining that coveted crisp crust.
- Serve immediately, ideally with a side of tomato soup or a light salad. The warm, fragrant bread pairs perfectly with anything that needs a comforting boost.
That's it — you did it. But hold on, I've got a few more tricks that'll take this to another level…
Insider Tricks for Flawless Results
The Temperature Rule Nobody Follows
Many cooks think any oven temperature works, but 375°F is the sweet spot. At this heat, the butter melts just enough to coat the bread without scorching. If you go too high, the crust will brown too fast, leaving the inside under‑cooked. Keep your oven preheated before placing the bread; this ensures a uniform bake.
Why Your Nose Knows Best
Before you pull the bread out of the oven, take a deep sniff. A sweet, buttery aroma indicates the butter has fully infused into the bread. If you still smell raw butter, give it another minute or two. Your nose is a reliable judge of doneness.
The 5-Minute Rest That Changes Everything
After baking, let the bread rest on a rack for exactly five minutes. This pause allows the steam to redistribute, keeping the crust crisp while the interior stays soft. Skipping this step can leave the bread soggy, especially if you’re serving it hot.
Use a Skillet for a Crunchier Finish
If you prefer an extra crunch, finish the bread on a hot skillet for the last 30 seconds of baking. The direct heat will caramelize the butter, creating a crunchy, golden top that’s impossible to resist.
Seasoning on the Fly
If you’re unsure about the salt level, season each slice individually before baking. Sprinkle a light dusting of sea salt on each piece. This method prevents the bread from becoming overly salty, as you can adjust each slice to your preference.
Creative Twists and Variations
This recipe is a playground. Here are some of my favorite ways to switch things up:
Sunrise Citrus Twist
Add a teaspoon of lemon zest to the butter‑garlic mixture. The citrus brightens the flavor profile, making it perfect for brunch. Pair it with a light yogurt dip for a refreshing contrast.
Herb Garden Explosion
Swap parsley for fresh basil or thyme. The aromatic herbs bring a different dimension of flavor. This version pairs well with Mediterranean salads or grilled vegetables.
Cheesy Delight
Sprinkle shredded mozzarella or grated Parmesan over the bread before baking. The cheese melts into the butter, creating a gooey, savory topping that’s irresistible. Serve with a tomato basil soup.
Spicy Kick
Add a pinch of red pepper flakes to the butter mixture. The heat complements the garlic and onions, giving the bread a subtle spicy edge. This is great for a crowd that loves a bit of heat.
Vegan Version
Use a plant‑based butter alternative and replace any dairy with a vegan cheese. The flavor stays the same, but it’s suitable for vegans and lactose‑intolerant diners. The texture remains buttery and crisp.
Breakfast Boost
Serve the bread with a fried egg on top, creating a breakfast sandwich. The yolk adds richness and the green onions keep the flavor bright. This is a quick, satisfying morning meal.
Storing and Bringing It Back to Life
Fridge Storage
Wrap the cooled bread slices tightly in plastic wrap and store in the refrigerator for up to 2 days. The butter will firm up, so when you’re ready to reheat, let it sit at room temperature for 10 minutes first.
Freezer Friendly
Place the sliced bread on a baking sheet and freeze until solid. Then transfer to a freezer bag. Store for up to 3 months. Thaw at room temperature before reheating to preserve crispness.
Best Reheating Method
Reheat in a preheated 350°F oven for 5–7 minutes. To keep the crust crisp, place the bread on a wire rack. Add a splash of water to the pan before reheating; the steam restores moisture and prevents dryness.