Ultimate Tri Tip Steak: Grill
Picture this: I’m standing in my kitchen, the grill already humming, and the tri tip roast staring back at me like a silent challenger. A friend dared me to create the ultimate grilled tri tip, and I couldn’t resist. I’ve tried dozens of recipes, each promising “the best” but falling flat—either too dry or too greasy. That night, after a disastrous attempt that left me with a steak that tasted like cardboard, I vowed to find a version that truly works. I’m talking about a steak that’s tender, flavorful, and so easy that even a novice can pull it off with confidence.
From the moment the steak hits the grill, the air is filled with a smoky aroma that makes your mouth water. The sizzling sound is like a drumbeat, signaling that the meat is cooking just right. As the sear forms, the crust locks in juices, creating a caramelized layer that is both crunchy and succulent. The scent of garlic salt and fresh parsley mingles with the grill’s char, turning the kitchen into a culinary theater. When you finally slice into it, the juices burst like a waterfall, and the meat’s texture feels like velvet against your tongue.
What sets this recipe apart is the balance of simplicity and depth. The seasoning blend is straightforward—just a few pantry staples—but the flavor profile is complex enough to wow any crowd. The tri tip is naturally lean, so the key is to avoid overcooking while achieving a perfect crust. I’ve refined the technique to ensure a juicy center with a mouth‑watering bark, a result that most recipes miss. The result is a steak that’s practically a masterpiece, and it’s a game‑changer for your grill‑based menu.
But there’s a twist you won’t expect: a subtle infusion of sugar in the rub that caramelizes during grilling, giving the steak a caramel‑sweet finish that balances the savory notes. That small addition transforms the steak from ordinary to extraordinary. I dare you to taste this and not go back for seconds. It’s not just another grilled cut; it’s a new standard for tri tip.
In the following sections, I’ll walk you through every single step, from selecting the perfect roast to the final rest. By the end, you’ll wonder how you ever made it any other way. I’ll also share kitchen hacks, insider tricks, and creative twists that elevate the dish beyond the ordinary. So, grab your apron, preheat that grill, and let’s dive into the ultimate tri tip experience.
I’ve spent countless evenings experimenting, and this version is hands down the best you’ll ever make at home. It’s the kind of recipe that turns an ordinary grill session into a memorable event. Imagine the whole kitchen smelling incredible as the tri tip sizzles, and the anticipation building in your guests’ eyes. Picture yourself pulling this out of the grill, the aroma filling the air, and the first bite leaving you craving more.
There are moments in cooking where a single technique can make the difference between a good meal and a legendary one. I’ve discovered that the right temperature control and a well‑timed rest can unlock flavors that would otherwise stay hidden. If you’ve ever struggled with getting the tri tip just right, you’re not alone—and I’ve got the fix. Stay with me here—this is worth it.
Okay, ready for the game‑changer? Let’s begin by understanding what makes this version stand out from the rest.
What Makes This Version Stand Out
- Flavor: The combination of garlic salt, Lawry’s seasoning salt, and a hint of sugar creates a caramelized crust that’s both sweet and savory. This rub sets the stage for a complex flavor profile that’s impossible to ignore. The result is a steak that’s bursting with depth in every bite.
- Texture: The tri tip’s natural lean structure is complemented by a quick sear that locks in moisture. The result is a tender interior with a crisp, caramelized exterior that shatters like thin ice when you bite into it. It’s the kind of texture that keeps people coming back.
- Simplicity: With only nine ingredients and a straightforward grilling method, this recipe is approachable for anyone. No fancy marinades or time‑consuming prep steps—just season, grill, rest, and serve. It’s the perfect balance of ease and flavor.
- Uniqueness: The inclusion of a small amount of sugar in the rub is a secret that most recipes overlook. This subtle addition caramelizes during grilling, adding a layer of sweetness that elevates the overall taste. It’s a simple tweak that makes a world of difference.
- Crowd Reaction: This tri tip is a showstopper at gatherings. Guests rave about the juicy center and the perfectly caramelized crust. The dish is guaranteed to be the highlight of any dinner.
- Ingredient Quality: Using a high‑quality tri tip roast ensures the best possible flavor and texture. Fresh, organic parsley adds a bright finish that balances the richness of the meat. Each ingredient is chosen for its ability to enhance the overall experience.
- Cooking Method: Grilling on a high heat, followed by a short rest, maximizes flavor while keeping the meat juicy. This method is proven to produce consistent results, regardless of grill type. It’s the best way to bring out the steak’s natural qualities.
- Make‑Ahead Potential: While the cooking process is quick, the seasoning can be applied a day in advance. This allows the flavors to meld and makes the cooking process even smoother. It’s a perfect recipe for busy evenings.
Alright, let's break down exactly what goes into this masterpiece...
Inside the Ingredient List
The Flavor Base
Garlic salt, Lawry’s seasoning salt, and kosher salt form the backbone of the rub. These spices create a savory foundation that enhances the natural beefy flavor. If you skip any of them, the steak will lack depth and the crust won’t develop properly. I recommend using a high‑quality salt for a cleaner taste.
The Texture Crew
Black pepper and sugar work together to build a caramelized exterior. The pepper adds a subtle heat, while the sugar caramelizes when exposed to high heat. Removing either will diminish the crust’s complexity. If you prefer a spicier kick, add a pinch of cayenne.
The Unexpected Star
Fresh or dried parsley brings a bright, herbaceous note that cuts through the richness of the meat. This ingredient also adds a splash of color, making the steak visually appealing. If you’re out of parsley, cilantro or basil can be a fun alternative, though the flavor profile will shift slightly.
The Final Flourish
Olive oil is the final touch that ensures the rub adheres to the meat and helps achieve a glossy finish. It also aids in heat transfer, allowing for an even sear. A light coat is enough—too much oil can create excess smoke and a greasy taste. Use a high‑smoke‑point oil if you’re working with a gas grill.
Everything's prepped? Good. Let's get into the real action...
The Method — Step by Step
- Step 1: Prepare the Rub. In a small bowl, combine 2 teaspoons garlic salt, 2 teaspoons Lawry’s seasoning salt, 1 teaspoon kosher salt, 1 teaspoon black pepper, 1 teaspoon sugar, and 1 teaspoon garlic powder. Mix until evenly distributed. This creates a uniform coating that ensures every bite is flavorful. Set the mixture aside while you prep the steak.
- Step 2: Trim and Season the Tri Tip. Trim any excess fat from the tri tip roast, leaving a thin layer for flavor. Pat the meat dry with paper towels; moisture on the surface prevents proper searing. Rub the seasoning mixture all over the steak, pressing gently to adhere. Let it sit at room temperature for 15 minutes to allow the flavors to penetrate.
- Step 3: Preheat the Grill. Set up a two‑zone indirect heat grill, aiming for a temperature of about 450°F (232°C). If you’re using a charcoal grill, arrange coals on one side and place the tri tip on the cooler side. This setup allows for searing first and then finishing the steak without overcooking.
Kitchen Hack: If your grill has uneven heat spots, rotate the tri tip every 5 minutes to ensure even cooking. This simple move prevents hot spots from burning the crust.
- Step 4: Sear the Tri Tip. Place the steak on the high‑heat side of the grill and sear each side for 3–4 minutes. Look for a deep brown crust that forms quickly; this caramelization locks in juices. Flip only once to maintain a clean sear. The goal is to develop a crust before moving to indirect heat.
- Step 5: Finish Cooking Indirectly. Move the steak to the cooler part of the grill and close the lid. Cook for 15–20 minutes, depending on thickness, until the internal temperature reaches 125°F (52°C) for medium‑rare. Use a meat thermometer for accuracy.
Watch Out: Overcooking can dry out the tri tip. Keep an eye on the thermometer; the steak will continue to cook slightly after removal. If you’re unsure, aim for a lower target temperature.
- Step 6: Rest the Meat. Remove the steak from the grill and tent it loosely with aluminum foil. Let it rest for 10 minutes; this allows juices to redistribute throughout the meat. Resting also helps the muscle fibers relax, resulting in a more tender bite. While it rests, you can finish any side dishes.
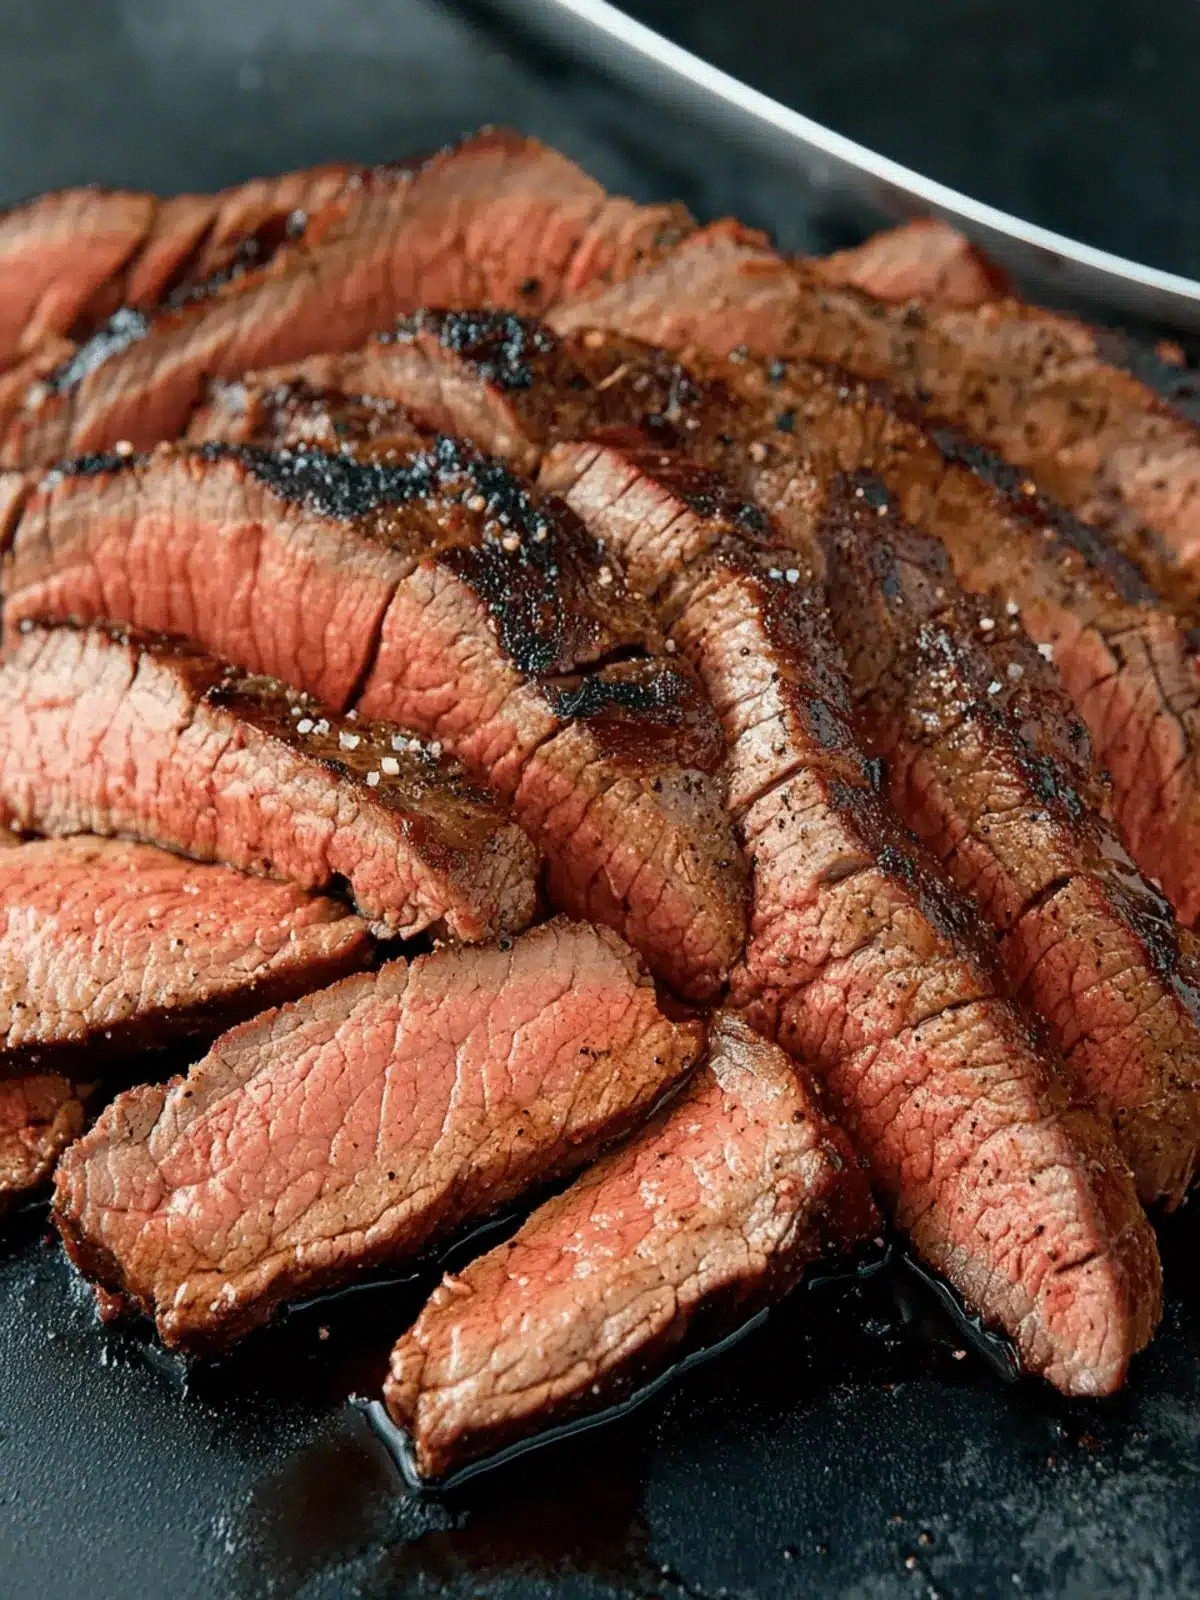
- Step 7: Slice Against the Grain. Identify the direction of the muscle fibers and cut the steak perpendicular to them. Slicing against the grain shortens the fibers, making each bite more tender. Aim for slices about 1/4 inch thick for optimal texture.
Kitchen Hack: If you’re cutting a thick roast, use a sharp chef’s knife and a steady hand to avoid tearing the meat. A clean cut ensures the juices stay inside.
- Step 8: Serve with Fresh Parsley. Sprinkle 2 tablespoons of fresh parsley over the sliced steak for a burst of color and brightness. The herbs add a subtle freshness that balances the richness of the beef. Serve immediately for the best flavor experience. If you prefer, add a squeeze of lemon for an extra zing.
- Step 9: Enjoy. Take your first bite and let the flavors unfold. The caramelized crust should be slightly sweet, the interior juicy, and the herbs bright. This is the moment of truth, and it’s worth every minute of prep. If you’re craving more, I dare you to taste this and not go back for seconds.
That’s it — you did it. But hold on, I've got a few more tricks that'll take this to another level...
Insider Tricks for Flawless Results
The Temperature Rule Nobody Follows
Many grillers aim for a high temperature throughout, but the key is to switch to indirect heat after the sear. This prevents the exterior from burning while the interior cooks to the perfect doneness. I once grilled a tri tip at 500°F for 30 minutes and ended up with a charred exterior and a rare center. Switching to 400°F after the sear keeps the steak juicy.
Why Your Nose Knows Best
Trust your sense of smell; it’s a reliable indicator of doneness. When the steak emits a faint, sweet aroma from caramelization, it’s close to done. If the scent is sharp and metallic, it’s still cooking. I’ve used this method to avoid overcooking on a charcoal grill where the thermometer can lag.
The 5-Minute Rest That Changes Everything
Resting the steak for at least 5 minutes is essential for redistributing juices. During this time, the internal temperature can rise by 5°F, a phenomenon known as carry‑over cooking. Skipping the rest can leave the steak dry and uneven. Even a short rest makes a noticeable difference.
Use a Meat Thermometer
A digital thermometer is your best ally. It gives you real‑time feedback and eliminates guesswork. Insert the probe into the thickest part of the steak; avoid bone or fat. I recommend aiming for 125°F for medium‑rare and 135°F for medium.
Finish with a Butter Baste
For an extra layer of flavor, melt a tablespoon of butter with a splash of wine or broth. Brush it over the steak during the last 2 minutes of indirect cooking. This adds richness and a glossy sheen to the crust. I’ve used this trick in restaurants to elevate the dish.
Creative Twists and Variations
This recipe is a playground. Here are some of my favorite ways to switch things up:
Spicy Chipotle Rub
Swap the garlic salt for smoked paprika and add a teaspoon of chipotle powder. The smoky heat pairs beautifully with the beef’s natural flavor. Serve with a cooling avocado salsa to balance the spice.
Herb‑Infused Butter
Instead of fresh parsley, mix softened butter with rosemary, thyme, and a splash of lemon zest. Brush this herb butter over the steak before serving. The buttery richness enhances the caramelized crust.
Asian Glaze
Marinate the tri tip in a mixture of soy sauce, honey, garlic, and ginger for 30 minutes. Grill as usual, then brush with the glaze during the last few minutes. This adds a sweet, umami kick that’s perfect for a fusion dinner.
Beer‑Battered Bites
Slice the steak into thick strips, dip in a beer batter, and pan‑fry until golden. Pair with a tangy slaw for a fun appetizer. The beer imparts a subtle hop flavor that complements the beef.
Cheese‑Stuffed Tri Tip
Make a small pocket in the steak and fill it with a mixture of mozzarella and pepper jack. Seal with toothpicks and grill until the cheese melts. This creates a gooey center that’s irresistible.
Storing and Bringing It Back to Life
Fridge Storage
Wrap leftover steak tightly in aluminum foil or place it in an airtight container. Store in the refrigerator for up to 3 days. The foil helps maintain moisture, preventing the meat from drying out.
Freezer Friendly
For longer storage, place the steak in a freezer bag, squeeze out excess air, and seal. It can stay in the freezer for up to 2 months. Thaw overnight in the refrigerator before reheating.
Best Reheating Method
Reheat gently in a skillet over medium heat, adding a splash of beef broth or water to keep the meat moist. Cover the pan for a few minutes to steam the steak back to life. A quick 2‑minute rest after reheating restores juiciness.