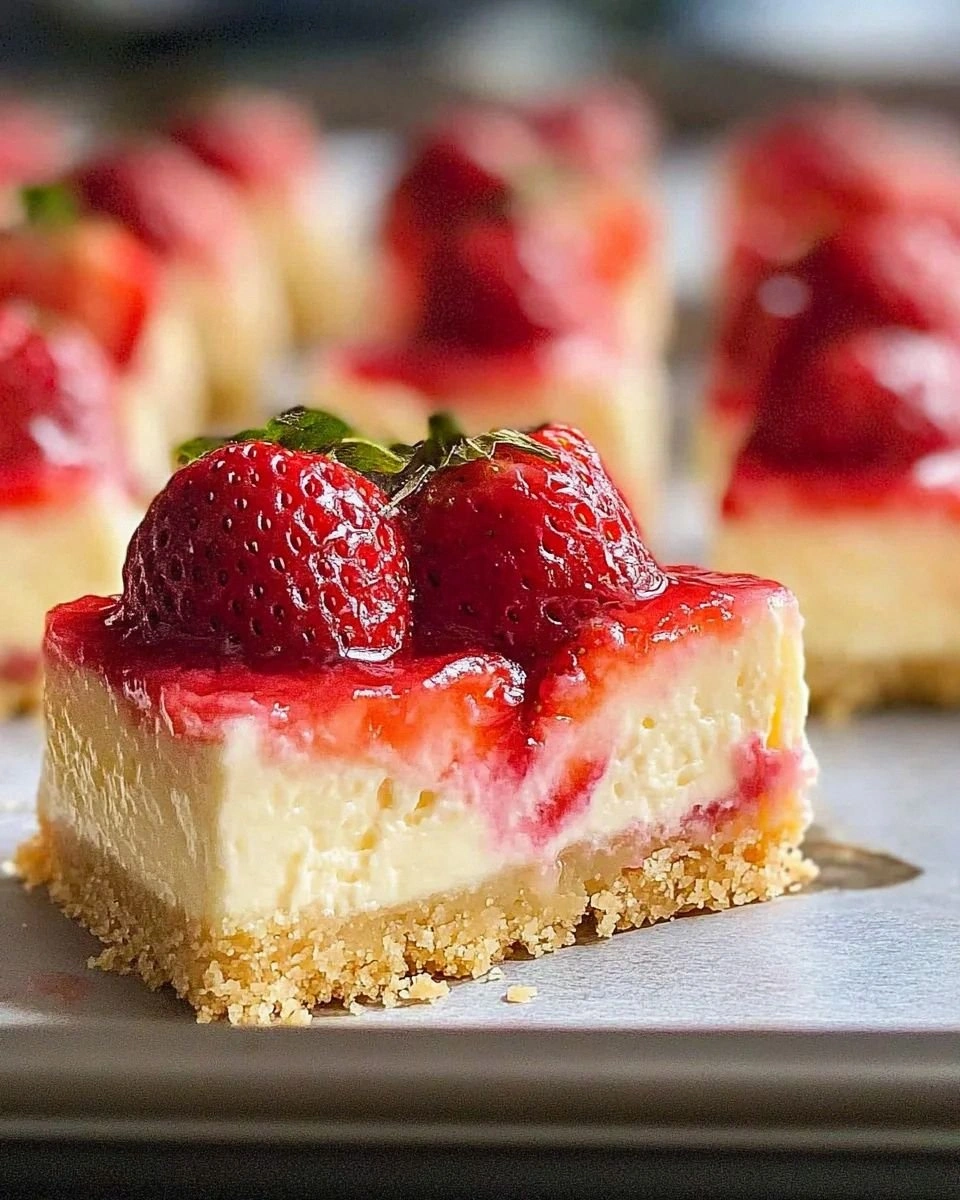
I still remember the day I ruined my first cheesecake. It was a humid Tuesday in July, and I was determined to impress my future in-laws with what I thought would be a foolproof dessert. The recipe I followed called for a water bath, which sounded simple enough until my springform pan leaked like a sieve and turned my oven into a sad, soggy mess. The cheesecake emerged with a crater in the center that looked like the moon's surface, and my father-in-law politely asked if it was supposed to be a "deconstructed" dessert. Fast forward through three more failed attempts, countless Google searches, and one particularly embarrassing grocery store meltdown in the cream cheese aisle, and I finally cracked the code. These cheesecake bars were born from that chaos, and I promise you they are bulletproof. No water bath needed, no fancy equipment required, and the result is so creamy and luscious that you'll question every other cheesecake recipe you've ever tried. The strawberry topping adds this bright, tangy counterpoint that makes the whole thing sing, but the base recipe is so good you could serve it plain and still have people fighting over the last piece. Picture yourself pulling these golden squares from the oven, the aroma of vanilla and butter wafting through your kitchen, knowing that in just a few hours you'll be biting into what I genuinely believe is the perfect dessert. Let me walk you through every single step — by the end, you'll wonder how you ever made it any other way.
What makes these cheesecake bars different from every other recipe cluttering up the internet? First, we're using a French technique called "sablage" for our crust that creates these impossibly tender, almost cookie-like layers that shatter delicately under your fork. The filling gets its silkiness from a combination of room temperature cream cheese (cold is the enemy of smooth) and a touch of sour cream that adds subtle tang without overwhelming the vanilla. But here's the game-changer: instead of baking the whole thing in a water bath that inevitably leaks, we bake it low and slow with a pan of hot water on the rack below. This creates the same steamy environment that prevents cracks, but without the disaster potential. The strawberries get a quick maceration with just enough sugar to draw out their juices and create this glossy, jewel-toned sauce that looks like it came from a Parisian patisserie. I dare you to taste the finished product and not immediately start planning when you can make it again.
I've served these bars at everything from backyard barbecues to fancy dinner parties, and they disappear faster than free drinks at a wedding. The beauty is in their versatility — they're elegant enough for a bridal shower but casual enough for a Tuesday night Netflix binge. The recipe makes enough to feed a crowd, but I've watched two people demolish the entire pan without a shred of remorse. What's particularly genius is that they actually taste better the second day, which means you can make them ahead and be the host who actually gets to enjoy their own party. The texture is this impossible balance of dense and fluffy, rich yet somehow not heavy, with that classic cheesecake tang balanced by the sweet-tart berries. If you've ever struggled with cheesecake before, you're not alone — and I've got the fix that'll restore your dessert confidence forever.
Before we dive into the nitty-gritty, let me share why this recipe became my obsession. After those initial failures, I spent months testing different methods, temperatures, and ingredient ratios. I learned that most recipes get the crust-to-filling ratio completely wrong, leaving you with either a sad, thin layer of cheesecake or a crust so thick it overwhelms everything else. I discovered that lemon juice brightens the flavor without making it taste like lemon cheesecake, and that a touch of cornstarch prevents weeping without affecting the texture. But the real revelation came when I realized that cutting them into bars instead of slicing from a round pan solves the biggest cheesecake problem: serving. No more worrying about getting clean slices, no more half-pieces crumbling apart, and everyone gets exactly the portion size they want. Okay, ready for the game-changer?
What Makes This Version Stand Out
Crust Perfection: Most recipes treat the crust as an afterthought, but we're using browned butter and a touch of brown sugar to create this deep, caramelized flavor that tastes like the best part of a cookie. The texture strikes that perfect balance between sturdy enough to hold the filling and tender enough to cut cleanly with a fork. I tested this crust with everything from digestive biscuits to vanilla wafers, and the winner was good old graham crackers with one secret ingredient that makes them taste homemade.
Foolproof Filling: The filling uses a reverse creaming method that prevents lumps without requiring you to remember to soften cream cheese hours ahead. Room temperature eggs and sour cream blend seamlessly, while the low baking temperature prevents the proteins from tightening up and creating that unpleasant rubbery texture. The result is this impossibly smooth, dense-yet-fluffy filling that slices like a dream.
No Water Bath Drama: Traditional cheesecakes demand a water bath that inevitably leaks, creating a mess and potentially dangerous steam burns. Our method uses a pan of hot water on the oven floor to create the same humid environment without any risk to your dessert or your skin. The low temperature and slow baking time ensure even cooking without the need for fancy equipment.
Strawberry Magic: Instead of just slicing berries on top, we're macerating them with a touch of balsamic vinegar and black pepper. Trust me on this — the vinegar enhances the berry flavor without making it taste like salad, and the pepper adds this subtle warmth that makes people ask what your secret ingredient is. The berries release their juices to create this gorgeous ruby syrup that soaks into the top layer of cheesecake.
Make-Ahead Champion: These bars actually improve overnight as the flavors meld and the texture sets. They're sturdy enough to travel to potlucks or picnics, and they hold up beautifully for up to five days refrigerated. I've frozen them successfully for up to three months, making them perfect for holiday prep or unexpected guests.
Crowd-Pleasing Portions: Cutting cheesecake into bars eliminates the serving anxiety that comes with traditional round cakes. Everyone gets a perfect portion with clean edges, and you can easily adjust the size based on your crowd. The recipe makes 16 generous bars or 24 smaller pieces for when you want just a taste of something sweet.
Flavor Flexibility: While strawberry is classic, the base recipe works beautifully with any berry or stone fruit. Swap in raspberries with a touch of Chambord, or try peaches with bourbon for a Southern twist. The filling is a blank canvas that plays well with whatever fruit is in season or whatever you have lurking in your freezer.
Alright, let's break down exactly what goes into this masterpiece...
Inside the Ingredient List
The Flavor Foundation
The graham crackers might seem basic, but they're the backbone of everything. I tested this with everything from chocolate cookies to shortbread, and nothing beats the honey-wheat flavor of graham crackers against the tangy cream cheese. The key is to grind them fine but not to dust — you want some texture to give the crust character. Browned butter takes this from ordinary to extraordinary, adding these nutty, caramel notes that make people ask if you used some fancy European butter. The brown sugar isn't just for sweetness; its molasses content adds depth and helps the crust hold together better than white sugar ever could.
Cream cheese is obviously the star, but not all blocks are created equal. Skip the low-fat versions — they contain more water and stabilizers that'll ruin your texture. Full-fat Philadelphia is my go-to because it has the perfect balance of tang and richness, but any premium brand works. The most important thing is temperature; cold cream cheese will never blend smoothly no matter how long you beat it. I leave mine on the counter overnight, but if you're in a rush, cube it and let it sit in a warm spot for an hour.
The Texture Team
Sour cream serves double duty here, adding tang while creating that silky texture that makes good cheesecake legendary. Don't substitute Greek yogurt — it's too lean and will make your filling grainy. The eggs need to be room temperature too; cold eggs will cause the cream cheese to seize up and create lumps. I crack mine into a bowl of warm water for five minutes while I prep everything else. Heavy cream might seem excessive in an already rich dessert, but it's what gives these bars their cloud-like texture. Skip it and you'll have dense, heavy bars that taste more like cream cheese frosting than cheesecake.
Cornstarch is my secret weapon for preventing the dreaded cheesecake weep. Just a teaspoon stabilizes the filling without affecting the taste or texture. Vanilla extract seems obvious, but use the good stuff — artificial vanilla tastes flat and chemical in something as simple as cheesecake. The lemon juice brightens all the flavors without making it taste like lemon dessert; it's the difference between a good cheesecake and a great one.
The Unexpected Star
The balsamic vinegar in the strawberries sounds weird until you try it. It enhances the berry flavor the same way salt enhances chocolate, making the fruit taste more like itself. Use a good quality aged balsamic — the cheap stuff tastes harsh and will ruin everything. Black pepper adds warmth and complexity without being identifiable; people will know something special is happening but won't be able to put their finger on it. Start with just a pinch — you can always add more, but you can't take it out.
The strawberries themselves should be ripe but not mushy. Underripe berries won't release enough juice, while overripe ones turn to mush. If strawberry season is over, frozen berries work beautifully — just thaw and drain them first. The sugar quantity might seem low, but ripe berries need very little help. Taste your fruit first and adjust accordingly; supermarket berries in February might need more sugar than farmers market gems in June.
The Final Flourish
Sea salt in the crust might seem counterintuitive, but it makes everything taste more like itself. Just a pinch enhances the butter flavor and prevents the crust from tasting one-dimensional. The salt in the filling balances the sweetness and makes the vanilla pop. Use kosher salt for the crust — it distributes more evenly than table salt. For the berries, a flaky sea salt like Maldon adds tiny bursts of salinity that make the sweet fruit even sweeter.
Unsalted butter gives you control over the salt level, but if all you have is salted, just omit the additional salt from the crust. The butter needs to be browned, not melted — this isn't the place for shortcuts. Browned butter adds complexity that regular melted butter can't match, creating these toffee-like notes that make the crust addictive on its own. Let it cool slightly before mixing so it doesn't melt the sugar and create a greasy crust.
Everything's prepped? Good. Let's get into the real action...
The Method — Step by Step
- Start by browning your butter — this is where the magic begins. Place the butter in a light-colored saucepan over medium heat so you can see the color change. It'll melt, then foam, then start making these tiny popping sounds as the water evaporates. Watch closely as it turns from yellow to golden to amber — the line between perfect and burnt is about 30 seconds. When it smells like toasted nuts and the milk solids at the bottom are deep brown, immediately pour it into a heatproof bowl. Let it cool while you prep everything else, but don't skip this step — browned butter is what separates good cheesecake bars from legendary ones.
- Make the crust while the butter cools. Pulse the graham crackers in a food processor until they're mostly fine crumbs with some pea-sized pieces for texture. Add the brown sugar, salt, and cooled browned butter, then pulse until it looks like wet sand. The mixture should hold together when squeezed but not be greasy. Press it firmly into your prepared pan — I use the bottom of a measuring cup to get it even and compact. Don't be gentle here; a firmly packed crust won't crumble when you cut the bars. Bake until it's fragrant and starting to brown around the edges, about 8-10 minutes. Let it cool while you make the filling.
- Beat the cream cheese until it's completely smooth and lightened, about 2-3 minutes on medium speed. This is crucial — any lumps now will be lumps forever. Scrape the bowl frequently, especially the bottom where cream cheese loves to hide. Add the sugar gradually, beating until it's fully incorporated and the mixture looks fluffy. The goal is to dissolve the sugar completely so your bars aren't grainy. Don't rush this step; properly creamed cheese and sugar creates the smooth texture that makes these bars special.
- Add the sour cream and vanilla, beating until combined. The mixture should look smooth and glossy at this point. Add the eggs one at a time, beating just until each disappears into the batter. Overbeating eggs incorporates too much air, which causes cracks and a spongy texture. Mix in the heavy cream and lemon juice just until combined. The batter should be pourable but thick, like a milkshake. If it looks curdled, your cream cheese was too cold — beat a bit longer or warm the bowl slightly.
- Pour the filling over your cooled crust and smooth the top with an offset spatula. Tap the pan gently on the counter to release any air bubbles. Place a large roasting pan filled with hot water on the bottom rack of your oven — this creates steam that prevents cracks. Bake at 325°F for about 45-50 minutes, until the edges are set but the center still jiggles slightly when you shake the pan. Don't overbake — carryover cooking will finish the job. The cheesecake should look puffed and lightly golden around the edges.
- While the cheesecake bakes, prepare the strawberries. Hull and slice them about 1/4-inch thick — too thin and they'll turn to mush, too thick and they won't macerate properly. Toss them with sugar, balsamic vinegar, and a tiny pinch of black pepper. Let them sit at room temperature, stirring occasionally. The berries will release their juices and create this gorgeous syrup. Taste after 30 minutes and adjust seasoning — you might need more sugar for tart berries or more vinegar for bland ones.
- Cool the cheesecake completely in the pan on a wire rack, then refrigerate for at least 4 hours or overnight. This is when the magic happens — the texture firms up and the flavors meld into something extraordinary. Don't rush this step with the freezer unless you absolutely must; slow chilling prevents cracks and gives you the creamiest texture. Once chilled, lift the bars out using the parchment paper handles and cut into squares with a sharp knife dipped in hot water. Wipe the knife between cuts for perfect edges.
- Spoon the macerated strawberries over each bar just before serving, making sure everyone gets plenty of that gorgeous syrup. A dollop of whipped cream is optional but highly recommended for the full dessert experience. These bars are best served chilled but not ice-cold — let them sit at room temperature for 10-15 minutes before serving for the creamiest texture. Store leftovers in an airtight container in the refrigerator for up to 5 days, though they've never lasted that long in my house.
That's it — you did it. But hold on, I've got a few more tricks that'll take this to another level...
Insider Tricks for Flawless Results
The Temperature Rule Nobody Follows
Room temperature isn't just a suggestion — it's the difference between silky-smooth cheesecake and a lumpy disaster. But here's what most recipes won't tell you: "room temperature" actually means around 67-70°F. In summer, your ingredients might be warmer than this, causing the filling to be too loose. In winter, they might need longer to warm up. I use a instant-read thermometer to check my cream cheese — it should feel soft but still hold its shape. If it's warmer than 72°F, refrigerate it for 15 minutes before using. Cold ingredients won't blend properly, but too-warm ingredients will make your bars slump in the middle and never fully set.
Why Your Nose Knows Best
Don't rely solely on the timer — your nose is your best tool here. When the cheesecake is perfectly baked, your kitchen will smell like vanilla and butter with just a hint of sweetness. If it starts to smell eggy or overly sweet, it's probably overbaked. The edges should be just pulling away from the sides of the pan, and the center should move as one unit when you gently shake it. Think of it like testing Jell-O — it should jiggle but not ripple. If you're still unsure, insert an instant-read thermometer into the center; it should read 150°F when done.
The 5-Minute Rest That Changes Everything
After you turn off the oven, let the cheesecake sit inside with the door cracked open for 5 minutes. This prevents the dramatic temperature change that causes cracks and sinking. Then remove it and let it cool completely at room temperature before refrigerating. I know it's tempting to speed things up, but that gradual cooling process is what gives you the creamiest texture. A friend tried skipping this step once — let's just say her bars looked like the surface of Mars and had the texture of rubber. Patience pays off here.
The Strawberry Timing Secret
Macerate your strawberries while the cheesecake bakes, but don't add them too early or they'll get mushy and lose their bright color. Thirty minutes is the sweet spot — enough time to release their juices but not so long they break down. If you're making these ahead, prepare the berries separately and combine just before serving. The syrup will thicken slightly as it cools, creating this gorgeous glossy coating that looks professional. Taste your berries first — supermarket strawberries in February might need more sugar, while peak-season farmers market berries might need less.
The Storage Revelation
Here's something that'll blow your mind: these bars freeze beautifully. Cut them into portions, wrap each piece tightly in plastic wrap, then foil, and freeze for up to 3 months. Thaw overnight in the refrigerator and they're as good as fresh. But here's the pro tip: freeze them WITHOUT the strawberry topping. Make the berries fresh when you're ready to serve, or just serve them with a dollop of jam if you're feeling lazy. I've served these at holiday parties straight from the freezer — people assumed I spent all day baking when really I just thawed them that morning.
Creative Twists and Variations
This recipe is a playground. Here are some of my favorite ways to switch things up:
Raspberry Limoncello Bars
Swap the strawberries for fresh raspberries and add 2 tablespoons of Limoncello to the filling with the vanilla. The combination of tart raspberries and bright lemon liqueur creates this sophisticated flavor that tastes like summer in Italy. Top with fresh raspberries and a sprinkle of lemon zest. These are show-stoppers at bridal showers — they look and taste like they came from a fancy bakery, but they're actually easier than the original since raspberries don't need to be sliced.
Salted Caramel Apple Bars
Replace the strawberry topping with thinly sliced apples sautéed in butter, brown sugar, and a pinch of salt. Add a swirl of salted caramel to the filling before baking by dropping spoonfuls on top and running a knife through. The sweet-tart apples with the rich caramel against the tangy cheesecake creates this autumn flavor profile that makes people forget pumpkin spice exists. These are dangerous — I've seen grown adults fight over the last piece.
Chocolate Hazelnut Dream
Add 1/4 cup of good cocoa powder to the crust for a chocolate cookie base. Swirl 1/2 cup of Nutella through the filling before baking, and top with toasted hazelnuts and chocolate shavings. The chocolate crust adds depth without overwhelming the cheesecake, while the Nutella creates these beautiful marbled patterns. Toast the hazelnuts yourself — the store-bought ones are never as fresh and flavorful.
Tropical Mango Coconut
Replace half the graham crackers with coconut cookies for the crust, and add 1/4 cup of coconut cream to the filling. Top with fresh mango chunks macerated in a bit of lime juice and honey. The coconut adds this tropical note that transports you to a beach vacation, while the mango provides bright acidity to cut through the richness. These are particularly stunning with their sunny yellow topping against the white cheesecake.
Espresso Martini Bars
Add 2 tablespoons of espresso powder to the filling and replace the vanilla with coffee liqueur. Top with chocolate-covered espresso beans and a dusting of cocoa powder. The coffee flavor intensifies the cheesecake's tang while adding this sophisticated bitterness that coffee lovers go crazy for. These are dangerous after dinner — the caffeine hit keeps the party going.
Berry Medley Bliss
Use a mix of whatever berries look best at the market — blueberries, blackberries, raspberries, and strawberries all together. The different textures and flavors create this beautiful mosaic effect, and the varying levels of sweetness mean every bite is different. Add a touch of orange zest to the berry mixture for brightness. This is my go-to for summer parties when berries are cheap and abundant.
Storing and Bringing It Back to Life
Fridge Storage
These bars keep beautifully in the refrigerator for up to 5 days, making them perfect for meal prep or entertaining. Store them in an airtight container with parchment paper between layers to prevent sticking. If you've already topped them with strawberries, they'll keep for 3 days, though the berries are best within the first 48 hours. The cheesecake actually firms up and the flavors meld after the first day, so making them ahead is encouraged. Keep them toward the back of the fridge where the temperature is most consistent — the door is too warm and will cause them to soften and weep.
Freezer Friendly
These bars are freezer champions, maintaining their texture and flavor for up to 3 months when properly wrapped. Cut them into portions first, then wrap each piece tightly in plastic wrap, followed by aluminum foil. Label with the date because frozen cheesecake is impossible to identify after a few weeks. Thaw overnight in the refrigerator, not at room temperature, which can cause condensation that makes the crust soggy. For best results, freeze them plain and add fresh toppings after thawing. I've served these at holiday gatherings straight from the freezer — guests assumed I spent all day baking when really I just thawed them that morning.
Best Reheating Method
While these are meant to be served cold, sometimes you want that fresh-baked warmth. For individual portions, microwave on 50% power for 10-15 seconds — just enough to take the chill off without melting the filling. For a crowd, place the bars in a 200°F oven for 5-7 minutes. The key is gentle warming that softens the cream cheese without turning it liquid. Never reheat with the strawberry topping — add that fresh or at room temperature. If the crust has softened in storage, refresh it by placing the bars under the broiler for 30-45 seconds, watching carefully to prevent burning. The gentle heat crisps up the crust while keeping the filling cool and creamy.