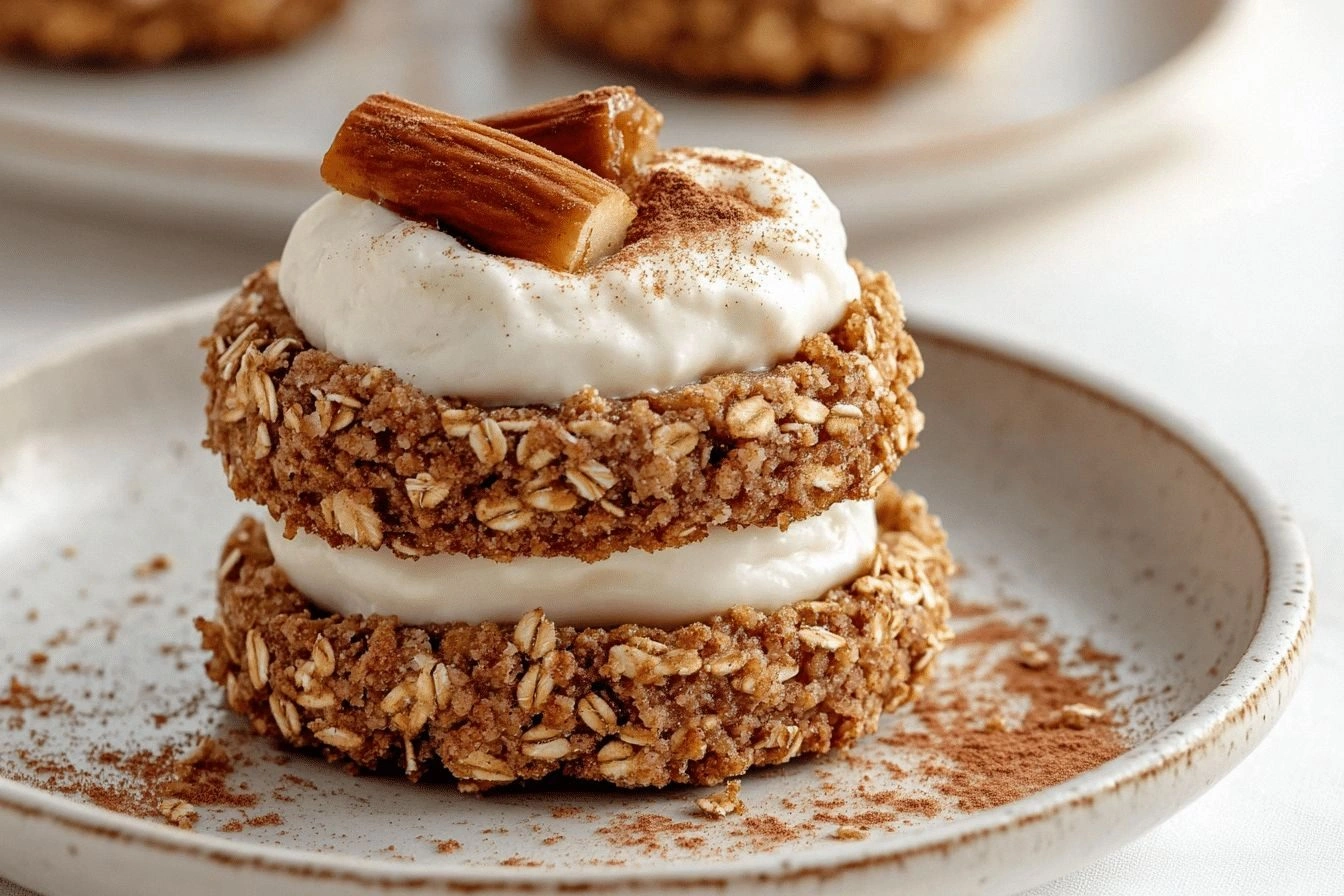
It was a Tuesday night when I accidentally burned my toast and decided, “I need something comforting.” The kitchen was a mess of crumbs, but the air was already smelling like cinnamon and apples from the radio’s playlist. I pulled out every apple I owned, sliced them thin, and tossed them into a bowl with sugar, nutmeg, and a generous dusting of cinnamon. The idea of a warm, creamy apple filling simmering beneath a buttery crust hit me like a revelation. I was so excited that I almost skipped the prep time. That moment was the spark that turned a kitchen mishap into the ultimate Cinnamon Apple Oatmeal Cream P.
Picture the scene: the orange glow of the oven lights, the faint hiss of the stove as the apples begin to caramelize, the gentle clink of a wooden spoon against the pan. The scent of toasted oats rises, mingling with the sweet tang of apples and the earthy aroma of fresh cinnamon. The sound of the crust bubbling as the filling thickens feels like a lullaby. When you bite into the first piece, the crust gives a satisfying crackle, the oat layer offers a chewy texture, and the apple filling explodes with caramelized sweetness. The cream coating on top glistens, inviting you to spread it with a spoon. Every bite is a comforting hug that feels like home.
What makes this version stand out from every other apple pie or oatmeal crumble on the internet? First, it’s the creamy oat layer that balances the tartness of apples with a silky texture that melts in your mouth. Second, the crust is a hybrid of flour and oats, giving it a nutty crunch without being too heavy. Third, the use of melted butter in the filling locks in moisture, preventing the pie from drying out. Fourth, the addition of lemon juice brightens the flavor profile, cutting through the sweetness. Fifth, the optional walnuts add a subtle crunch that complements the oat texture. Finally, the baking process is engineered so that the crust stays crisp while the filling remains silky.
I dare you to taste this and not go back for seconds, because once you try it, you’ll be convinced that this is hands down the best version you’ll ever make at home. The secret? A small amount of melted butter in the filling, a splash of lemon juice, and a generous dusting of cinnamon on the crust. Picture yourself pulling this out of the oven, the whole kitchen smelling incredible, and the pie cooling just enough to be served warm. And now, stay with me here—this is worth it. Let me walk you through every single step—by the end, you’ll wonder how you ever made it any other way.
What Makes This Version Stand Out
- Texture: The crust is a hybrid of flour and rolled oats, giving it a nutty crunch that contrasts beautifully with the silky filling. The oats absorb moisture, preventing a soggy base. If you skip the oats, you’ll end up with a crust that’s too buttery and lacks depth.
- Flavor: A generous dusting of ground cinnamon on the crust caramelizes into a caramelized spice layer. The apples are sliced thin to release their natural juices, creating a harmonious sweet‑tart balance. The lemon juice brightens the entire dish.
- Creaminess: The melted butter in the filling locks in moisture, making the filling thick yet silky. The combination of milk and heavy cream adds body without heaviness. Without this step, the filling can become dry.
- Nutty Element: Rolled oats bring a subtle earthiness that elevates the pie’s overall flavor profile. They also add a pleasant chew that keeps the pie from feeling flat. Oats are a healthier alternative to pure butter.
- Make‑Ahead: The pie can be assembled a day ahead, chilled, and baked right before serving. This gives the flavors time to meld, resulting in a richer taste. If you’re short on time, you can skip the chilling step and still get a great result.
- Audience: Whether you’re a picky eater or a food critic, this pie satisfies. The crust is flaky enough for traditionalists, while the oat layer appeals to those who love texture. The sweet‑spicy balance is universally appealing.
Alright, let's break down exactly what goes into this masterpiece...
Inside the Ingredient List
The Flavor Base
The apples are the heart of this pie. I always choose Granny Smith because its tartness balances the sweetness of the sugar and cinnamon. Slicing them thin allows the sugar to caramelize quickly, creating a glossy, caramelized surface. If you skip the apples, the pie loses its signature tartness and becomes a plain oat cake. For a sweeter version, try adding a splash of orange juice to the apples during the sauté.
The Texture Crew
Rolled oats are the unsung hero. They absorb excess moisture, keeping the crust crisp and preventing a soggy bottom. They also add a subtle chew that contrasts with the smooth filling. If you prefer a gluten‑free crust, substitute the all‑purpose flour with a 1:1 blend of gluten‑free flour and oat flour. The oats also provide a healthier profile, adding fiber and protein.
The Unexpected Star
Melted butter in the filling is the secret to that silky mouthfeel. When butter melts into the milk and cream, it creates a rich emulsion that coats the apples. Skipping the melted butter will make the filling runny and less cohesive. If you’re lactose intolerant, use a dairy‑free butter alternative to keep the texture intact.
The Final Flourish
Ground cinnamon on the crust caramelizes into a fragrant, slightly sweet crust. The nutmeg adds warmth without overpowering the apple flavor. A pinch of salt ties all the flavors together and enhances the sweetness. If you love a little heat, add a pinch of cayenne pepper for a subtle kick.
Everything's prepped? Good. Let's get into the real action...
The Method — Step by Step
- Preheat your oven to 375°F (190°C). While the oven heats, line a 9-inch pie dish with parchment paper. This will prevent sticking and make cleanup a breeze. Make sure the dish is completely dry before adding the crust.
- In a large bowl, whisk together the flour, rolled oats, brown sugar, ground cinnamon, nutmeg, and salt. The dry mix should look like coarse sand. This mixture will form the base of your crust and the oat layer. Keep it aside for later.
- In a separate pan, melt the cold cubed butter over medium heat until it’s foamy but not browned. Add the apples and stir until they’re coated in butter. The apples should sizzle, releasing their juices. Add the lemon juice, stir, and let it simmer until the apples are just tender.
- Pour the melted butter and apple mixture into the dry mix, then fold in the milk, heavy cream, and vanilla extract. The batter should be thick but pourable. If it’s too thick, add a splash of milk to reach the right consistency.
- Spread the batter into the prepared pie dish, smoothing the top with a spatula. The batter should cover the bottom evenly and rise slightly above the rim. This will become the creamy, oat‑laden layer of the pie.
- Bake in the preheated oven for 30 minutes, or until the crust is golden brown and the filling is set. The top should have a slight caramelized crust. Keep an eye on the edges; they should pull away from the dish slightly.
- While baking, sprinkle the remaining dry mix over the top to form a crunchy oat crust. This will give the pie a delightful crunch. If you prefer a softer crust, you can skip this step.
- Let the pie cool for 15 minutes before slicing. This allows the filling to set and makes it easier to cut clean slices. If you’re serving immediately, let it cool for at least 10 minutes.
- Serve warm with a dollop of whipped cream or a scoop of vanilla ice cream. The contrast between warm pie and cold cream is irresistible.
- Enjoy the sweet, spicy, and creamy layers that dance together in every bite. The final result is a comforting dessert that feels like a hug in a slice.
That's it — you did it. But hold on, I've got a few more tricks that'll take this to another level...
Insider Tricks for Flawless Results
The Temperature Rule Nobody Follows
Many bakers bake at 350°F, but 375°F gives the crust a golden, crisp finish without overcooking the filling. The higher temperature also helps the apples caramelize faster, creating a richer flavor. If you’re using a convection oven, reduce the temperature by 25°F to avoid burning the top. Keep the oven rack in the middle to ensure even heat distribution.
Why Your Nose Knows Best
As the pie bakes, the aroma of cinnamon and apples will fill your kitchen. Trust that scent as a cue for doneness. If the smell feels slightly caramelized, the pie is ready. This sensory checkpoint is more reliable than a timer alone. Your nose is your best judge.
The 5-Minute Rest That Changes Everything
After removing the pie from the oven, let it rest for five minutes before slicing. This rest period allows the filling to set, preventing it from sliding off the knife. The crust also settles, giving you clean, tidy slices. Skip this step and you’ll end up with a mess of gooey bits.
The Perfect Crumb
If you prefer a crunchier top, sprinkle a tablespoon of brown sugar over the batter before baking. The sugar caramelizes, creating a sweet, crisp layer. For a nutty twist, add a handful of chopped walnuts to the dry mix. The nuts will toast slightly during baking, adding a delightful crunch.
The Secret to a Silky Filling
Use heavy cream instead of milk alone. The higher fat content creates a smoother, richer filling that coats the apples. If you’re looking for a lighter version, replace half the cream with coconut milk. The coconut milk adds a subtle tropical note that pairs well with cinnamon.
The Quick Chill Trick
If you’re preparing the pie a day ahead, chill it in the fridge for at least four hours. The flavors meld, creating a deeper, more complex taste. When you’re ready to bake, let the pie come to room temperature for 15 minutes to ensure even baking. This quick chill trick saves time on busy mornings.
Creative Twists and Variations
This recipe is a playground. Here are some of my favorite ways to switch things up:
Maple Syrup Swirl
Replace the brown sugar with maple syrup for a natural sweetener. Drizzle the syrup over the apples before baking. The result is a caramelized maple flavor that pairs beautifully with cinnamon.
Spiced Chocolate Drizzle
Add a tablespoon of cocoa powder to the dry mix for a chocolatey twist. Sprinkle a pinch of cayenne pepper to keep the heat. The chocolate and cinnamon create a decadent flavor profile.
Cranberry Crunch
Swap apples for dried cranberries in the filling. Add a splash of orange juice to balance the tartness. The cranberries give a chewy texture and bright color.
Almond Butter Glaze
Drizzle almond butter over the top after baking. The almond butter adds a nutty richness that complements the oat crust. Finish with a dusting of powdered sugar for a sweet finish.
Vanilla Bean Infusion
Split a vanilla bean and scrape the seeds into the filling. Add the bean pod to the mixture. The vanilla adds depth and a floral note that elevates the overall flavor.
Coconut Coconut Crunch
Replace the heavy cream with coconut milk and sprinkle toasted coconut on top before baking. The coconut adds a tropical twist and a subtle crunch. It’s a perfect pairing for summer evenings.
Storing and Bringing It Back to Life
Fridge Storage
Store the pie in an airtight container in the fridge for up to 3 days. The crust stays firm, and the filling remains creamy. Let it sit at room temperature for 10 minutes before serving to bring out the flavors.
Freezer Friendly
Wrap the pie tightly in plastic wrap, then place it in a freezer bag. It will keep for up to 2 months. Thaw overnight in the fridge before reheating. The crust will remain crisp, and the filling will be silky.
Best Reheating Method
Reheat the pie in a preheated oven at 350°F for 10 minutes. Add a splash of water to the bottom of the dish to keep the filling moist. The result is a warm, freshly baked pie every time.