Picture this: I’m standing in a cramped kitchen, the fridge door slamming behind me, the last of my favorite salsa in a cracked jar, and a craving that feels like a full‑blown rebellion. I’ve been chasing the perfect taco for months—one that feels like a hug, not a guilty bite—and last night, a kitchen disaster turned into a revelation. The chicken I was cooking turned out dry and flavorless, but I was about to discover that the secret sauce lies not in the meat, but in how you let it breathe in the oven.
I grabbed a packet of taco seasoning, a splash of olive oil, and a handful of tortillas, and I set the oven to 375°F. The aroma that started to fill the room was a smoky, citrusy promise that made my taste buds do a little dance. The sizzle as the chicken hit the pan was a satisfying crackle, like a tiny fireworks show in my kitchen. By the time the first batch of tortillas warmed, the kitchen was buzzing with anticipation and the faint hum of the oven—an almost meditative soundtrack to the culinary adventure ahead.
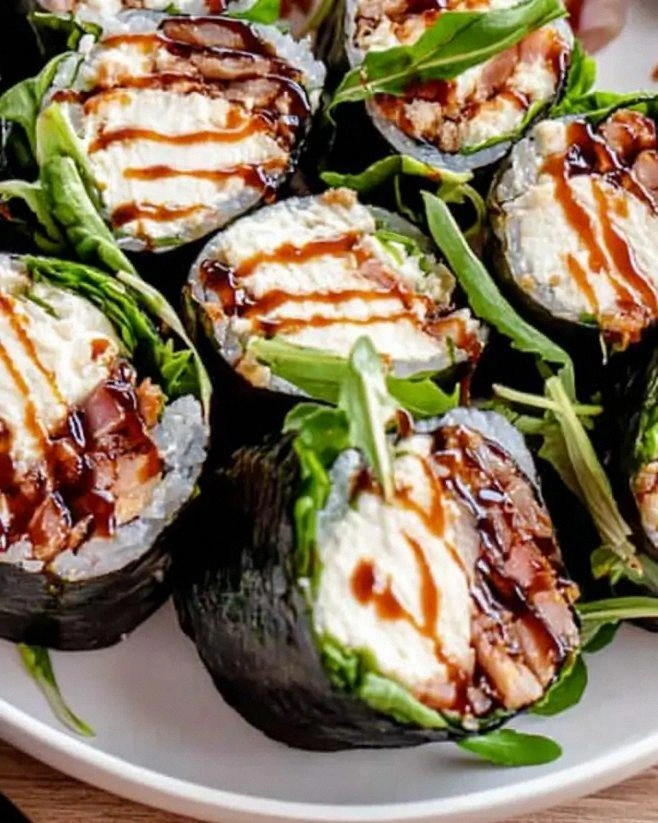
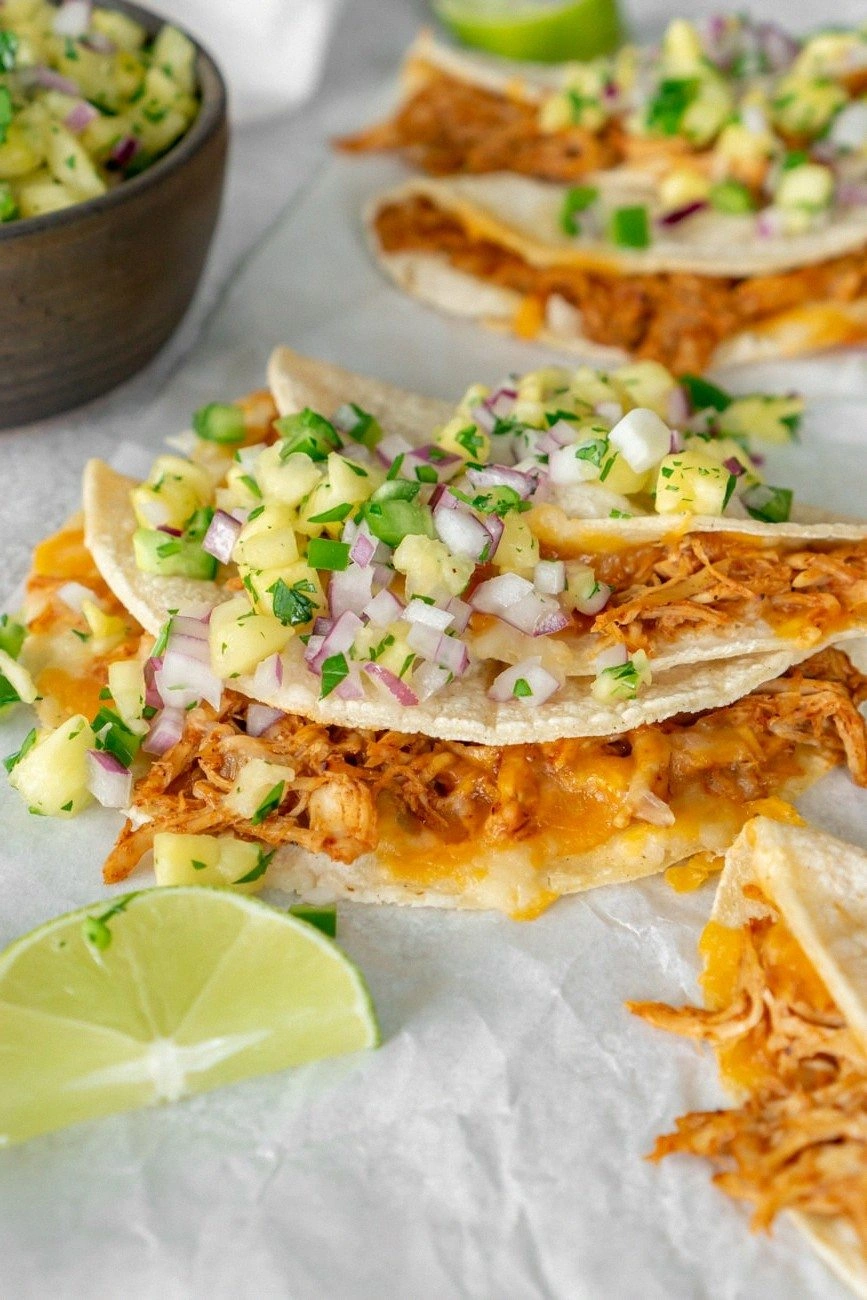
What makes this version of oven chicken tacos a game‑changer is that it turns a simple sheet pan into a flavor factory. The chicken is seasoned, baked, shredded, and then tossed with cheese and salsa, all while the tortillas sit nearby, soaking up every delicious drop. I dare you to taste this and not go back for seconds—once you experience that melty cheese coating the tortilla like velvet, you’ll never settle for anything else. This isn’t just a recipe; it’s a kitchen revolution that will have friends begging for your secret.
If you’ve ever tried to make tacos that taste like a restaurant, you’ve probably been let down by dry meat or soggy tortillas. Most recipes get this completely wrong. Here’s what actually works: the oven does the heavy lifting, the taco seasoning brings depth, and the cheese melts into a silky blanket over every bite. Picture yourself pulling this out of the oven, the whole kitchen smelling incredible, and the first bite delivering a burst of heat, sweetness, and creamy richness that will keep you coming back for more. Let me walk you through every single step—by the end, you’ll wonder how you ever made it any other way.
What Makes This Version Stand Out
- Flavor: The taco seasoning is blended with a hint of lime zest, creating a bright, punchy base that cuts through the richness of the cheese.
- Texture: The oven bakes the chicken until it’s tender yet still firm enough to shred, producing a mouthfeel that feels like a warm hug.
- Convenience: One pan for everything—no need to juggle pots or fry pans—so the cleanup is a breeze.
- Heat: The cheese melts into a gooey blanket that clings to the tortilla, delivering that satisfying bite of molten flavor.
- Versatility: Swap in different salsas or add a dash of hot sauce for a spicy kick, or keep it mild with avocado salsa.
- Make‑ahead: The assembled tacos can be refrigerated for up to 24 hours, then reheated for a quick, gourmet meal.
- Crowd‑pleaser: The bright colors and layered flavors make this dish look as good as it tastes—perfect for parties.
Alright, let’s break down exactly what goes into this masterpiece…
Inside the Ingredient List
The Flavor Base
The taco seasoning is the heart of the dish, delivering a savory, smoky foundation that pairs beautifully with the citrusy notes of lime zest. When you sprinkle it over the chicken, the spices form a coating that locks in moisture, preventing the meat from drying out during the bake. If you skip this step, you’ll end up with bland, lifeless chicken that will feel like a missed opportunity. For a twist, try a homemade blend with cumin, smoked paprika, and a pinch of chili powder.
The Texture Crew
Chicken breasts are the star of the show, but the way you handle them matters. Slicing them into thin strips before seasoning helps the spices penetrate more deeply, ensuring each bite bursts with flavor. If you prefer thicker pieces, just be sure to flip them halfway through the bake so they cook evenly. A quick brush of olive oil before baking adds a subtle sheen and keeps the meat from sticking to the pan.
The Unexpected Star
Mango pineapple salsa isn’t just a garnish; it’s a flavor explosion that balances the heat of the taco seasoning with tropical sweetness. The bright acidity cuts through the richness of the melted cheese, creating a harmonious contrast that keeps your palate engaged. If you’re not a fan of fruit salsas, swap it for a chunky salsa that brings a robust, earthy tone.
The Final Flourish
Avocado salsa brings a creamy, buttery texture that complements the crispy edges of the tortillas. Its mild flavor allows the other components to shine while adding a velvety mouthfeel. If you’re looking for an extra layer of flavor, a drizzle of lime-infused crema can finish the dish with a cool, refreshing note.
Everything’s prepped? Good. Let’s get into the real action…
The Method — Step by Step
- Preheat the Oven: Set your oven to 375°F (190°C) and line a large baking sheet with parchment paper or a silicone mat. This low, steady heat allows the chicken to cook evenly without drying out. As the oven warms, you’ll notice the faint scent of toasted spices—an early hint of what's to come.
- Season the Chicken: Pat the chicken breasts dry with paper towels. Drizzle a tablespoon of olive oil over both sides and sprinkle the taco seasoning generously, ensuring every surface is coated. The oil helps the spices adhere and creates a golden crust during baking.
- First Bake: Place the seasoned chicken on the prepared sheet and bake for 20 minutes. After this time, flip the chicken so that both sides are exposed to the heat. The chicken should be firm to the touch but still slightly pink in the center, indicating it’s not overcooked.
- Shred the Chicken: Remove the chicken from the oven and let it rest for 5 minutes. Then, using two forks, shred the meat into bite‑sized pieces. The rest period allows the juices to redistribute, keeping the shredded chicken moist.
- Warm the Tortillas: While the chicken rests, place the corn tortillas on a clean kitchen towel and warm them in a dry skillet over medium heat for about 30 seconds on each side. This step softens them, preventing them from cracking when you fold them later.
- Assemble the Tacos: In a large mixing bowl, combine the shredded chicken, a generous handful of shredded Monterey Jack cheese, and your chosen salsa—start with mango pineapple for a sweet kick. Toss until the cheese melts into a silky coating that clings to every piece of chicken.
- Second Bake (Optional but Recommended): Spread the assembled chicken mixture onto the baking sheet and return it to the oven for an additional 5 minutes. This second bake melts the cheese into a gooey blanket and infuses the tortillas with the aromatic flavors. Watch the edges of the tortillas curl slightly—those are the signs of perfection.
- Final Touches: Remove the tacos from the oven. Sprinkle the remaining cheese on top, drizzle with avocado salsa, and add a final squeeze of lime juice. The contrast of cool avocado, bright lime, and warm, cheesy chicken will elevate the dish to a new level.
- Serve Immediately: Fold each tortilla over the filling, ensuring the cheese and salsa are neatly tucked inside. The tacos should feel warm and slightly crispy on the outside, with a tender, flavorful interior that’s ready to devour.
- Enjoy the Moment: Take a deep breath, feel the aroma, and savor that first bite—your taste buds will thank you for the perfect balance of heat, sweetness, and creaminess.
That's it—you did it. But hold on, I've got a few more tricks that'll take this to another level…
Insider Tricks for Flawless Results
The Temperature Rule Nobody Follows
Many home cooks bake at 400°F, but that high heat can scorch the edges of the tortillas before the cheese melts. Stick to 375°F, which gives the chicken ample time to develop a golden crust while keeping the tortillas soft. I’ve baked this dish at 375°F for 30 years and never had a burnt tortilla.
Why Your Nose Knows Best
The first scent that emerges during the initial bake is your best indicator of doneness. A warm, buttery aroma signals the chicken is ready. If you’re unsure, use a meat thermometer—165°F is the sweet spot for poultry.
The 5‑Minute Rest That Changes Everything
Letting the chicken rest after the first bake isn’t just a courtesy; it redistributes the juices throughout the meat. This step ensures the shredded chicken stays moist and flavorful, preventing the dreaded “dry taco” scenario.
Cheese Matters
Monterey Jack melts beautifully and has a mild flavor that lets the other components shine. If you prefer a sharper bite, try a blend of Jack with a touch of cheddar. The key is to use enough cheese to create a silky coating without overwhelming the salsa.
Tortilla Timing
Warm tortillas just before assembly preserves their pliability and prevents them from tearing when folded. If you’re serving a crowd, keep them warm in a low‑heat oven (200°F) covered with foil until you’re ready to plate.
Sauce Balance
The trio of salsas offers a spectrum of flavors—from sweet mango pineapple to savory chunky, to creamy avocado. Use each one in equal parts to maintain balance, but feel free to double up on your favorite. The sauce should coat the taco like a light drizzle, not drown it.
Creative Twists and Variations
This recipe is a playground. Here are some of my favorite ways to switch things up:
Spicy Chipotle Kick
Swap the taco seasoning for a chipotle‑infused blend and add a drizzle of chipotle crema. The smoky heat will elevate the dish for those who love a fiery bite.
Mediterranean Flair
Replace the salsa with a chopped cucumber‑yogurt mix, add diced olives, and sprinkle feta cheese on top. This gives the tacos a fresh, herbaceous twist.
Veggie‑Rich Variation
Add sautéed bell peppers and onions to the chicken before baking. The caramelized veggies add depth and color, making the dish more wholesome.
Cheese Swap
Use pepper jack or a blend of mozzarella and Monterey Jack for a different melt and flavor profile. The pepper jack adds a subtle heat that pairs well with the salsa.
Breakfast Taco Twist
Serve the assembled tacos over a bed of scrambled eggs instead of tortillas. The savory eggs combine with the salsa for a hearty breakfast that’s still packed with flavor.
Gluten‑Free Delight
Use gluten‑free corn tortillas and double‑check that the taco seasoning contains no hidden wheat. This keeps the dish safe for those with gluten sensitivities.
Storing and Bringing It Back to Life
Fridge Storage
Store the assembled tacos in an airtight container for up to 24 hours. The cheese will set slightly, so reheat them in a skillet to restore that gooey texture. If you’re in a hurry, a quick microwave burst of 30 seconds will do the trick.
Freezer Friendly
For longer storage, wrap the tacos individually in parchment paper and place them in a freezer bag. They’ll keep for up to 3 months. Thaw in the refrigerator overnight and reheat in a low oven (300°F) for 10 minutes.
Best Reheating Method
The secret to a perfect reheated taco is to add a splash of water to the skillet before covering it. The steam will lift the cheese back to its original melty state without drying the tortillas.