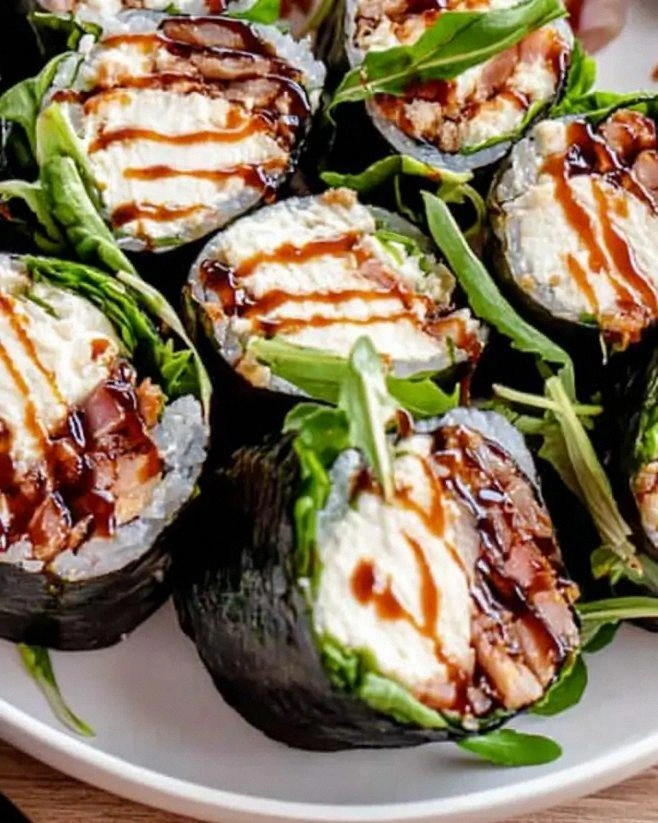
I still remember the first time I brought these cranberry feta pinwheels to a potluck. I was running late, my hair was a mess, and I had exactly twenty minutes to throw something together before my neighbor's annual holiday party started. The cream cheese was still slightly cold from the fridge, my tortillas had been sitting open for who knows how long, and I was frantically chopping dried cranberries while trying to remember if I'd already added the feta. Fast forward to that evening, and I watched in disbelief as people literally lined up at the buffet table for these pinwheels. One woman actually grabbed the last six with both hands and declared them "better than anything from that fancy bakery downtown." That sizzle of excitement when everyone discovered these little spirals of joy? Absolute perfection.
Here's the thing about most pinwheel recipes floating around the internet — they're either too bland, too soggy, or they taste like you just rolled up some sad lunch meat with cream cheese and called it a day. But these cranberry feta pinwheels? They're something else entirely. The sweet-tart cranberries dance with the salty feta in a way that makes your taste buds do a little happy dance, while the cream cheese acts like the perfect mediator, bringing everyone together in perfect harmony. The spinach adds just enough earthiness to keep things interesting, and those green onions? They're the unexpected plot twist that keeps people guessing what makes these so addictive.
I've spent the last three years perfecting this recipe, testing it on unsuspecting dinner guests, bringing it to office parties, and even whipping up a batch for my kid's teacher appreciation lunch. Every single time, without fail, someone asks for the recipe within the first five bites. I'll be honest — I ate half the batch before anyone else got to try it during my last photo shoot. They're that good. The combination might sound a little unusual at first, but trust me, this is hands down the best version you'll ever make at home.
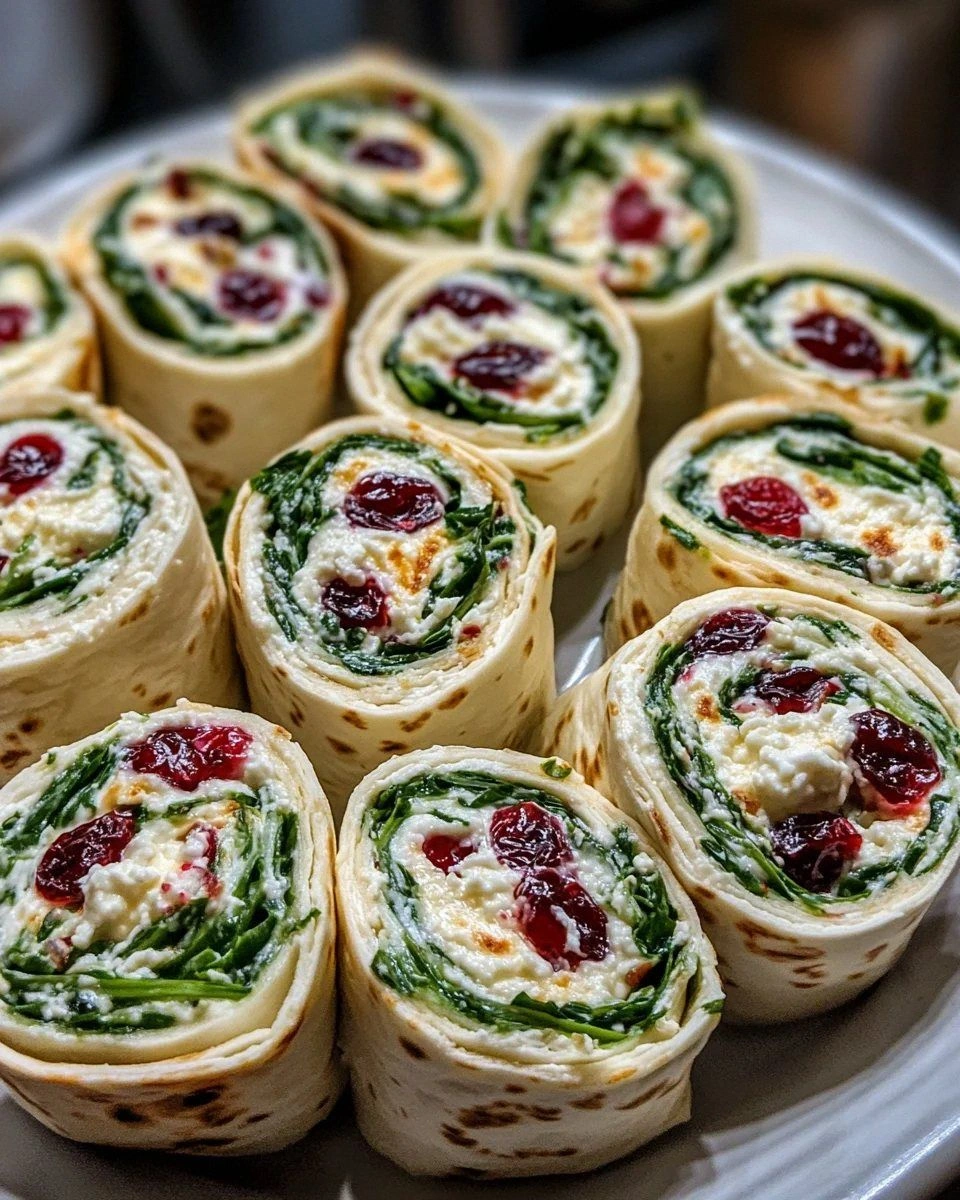
Picture yourself pulling these out of the fridge, the tortillas perfectly pliable, the filling visible through the translucent edges like a beautiful stained-glass window. The colors alone — deep ruby cranberries against the pale cream cheese, flecks of green spinach and white feta creating an almost mosaic pattern — make these pinwheels look like you spent hours crafting them. But here's the secret: they take fifteen minutes, tops. Let me walk you through every single step — by the end, you'll wonder how you ever made it any other way.
What Makes This Version Stand Out
Flavor Bomb: The combination of tangy feta and sweet-tart cranberries creates an explosion of taste that most pinwheel recipes completely miss. While others rely on boring combinations like ham and cheese, these little spirals pack a punch that keeps people coming back for more. The contrast between the creamy, salty, and sweet elements creates a complexity that tastes like you spent way more time on these than you actually did.
Perfect Texture: Most pinwheels either turn into a soggy mess or they're so dry they crumble apart. This recipe hits that sweet spot where the tortillas stay pliable but firm, the cream cheese provides a smooth base, and the cranberries add delightful little pops of chewiness throughout. Every bite has just the right amount of give without falling apart in your hands.
Stupidly Simple: If you can spread cream cheese on a bagel, you can make these pinwheels. There's no cooking, no complicated techniques, and no specialty equipment required. Even my friend who once managed to burn water (don't ask) can pull these off without breaking a sweat.
Unexpected Elegance: Despite taking minimal effort, these look like they came from a high-end caterer. The spirals are tight and uniform, the colors are vibrant, and they photograph beautifully for your Instagram feed. Your guests will assume you spent hours in the kitchen when you actually spent more time choosing what to watch on Netflix.
Crowd-Pleasing Magic: I dare you to taste this and not go back for seconds. These disappear faster than free samples at Costco, regardless of the crowd. Kids love them because they're fun and colorful, adults love them because they taste sophisticated, and even picky eaters can't resist the sweet-savory combination.
Make-Ahead Champion: Unlike most appetizers that need to be served immediately, these actually get better after a few hours in the fridge. The flavors meld together, the tortillas soften just enough, and you can slice them right before serving. Most recipes get this completely wrong — they tell you to serve immediately, but here's what actually works.
Ingredient Flexibility: While I'm giving you the ultimate version, this recipe is surprisingly forgiving. Need to use Neufchâtel instead of cream cheese? Go for it. Only have regular onions instead of green? It'll still work. The base combination is so solid that even minor substitutions won't derail your pinwheel party.
Alright, let's break down exactly what goes into this masterpiece...
Inside the Ingredient List
The Flavor Base
The cream cheese is your foundation here, and let me tell you, not all cream cheese is created equal. You want the full-fat version — none of that low-fat nonsense that tastes like disappointment and has the texture of spackle. The cream cheese needs to be properly softened, which means leaving it on the counter for at least 30 minutes before you start. If you're impatient like me, you can microwave it for 8-10 seconds, but watch it closely because nobody wants melted cream cheese soup. This is what holds everything together and provides that luscious, creamy backdrop that makes the other ingredients shine.
The Texture Crew
The feta cheese is where the magic happens — those salty, tangy crumbles that add little pockets of flavor throughout every bite. Don't you dare use pre-crumbled feta that's been sitting in a plastic tub for months. Buy a block of good feta and crumble it yourself; the difference is night and day. The dried cranberries need a rough chop so they distribute evenly and don't create giant chewy bombs in some bites and nothing in others. Fresh spinach gets the same treatment — a quick chiffonade so you get little flecks of green throughout without any overwhelming spinach flavor.
The Unexpected Star
Green onions might seem like an afterthought, but they're the secret weapon that ties everything together. That mild onion flavor brightens up the whole mixture and cuts through the richness of the cream cheese and feta. Use both the white and green parts — the white gives you that sharp onion bite while the green tops add a fresh, grassy note. Slice them thin so they distribute evenly and don't create overwhelming onion pockets.
The Final Flourish
The seasoning blend is what separates amateur pinwheels from professional ones. Black pepper adds just enough heat to keep things interesting, while garlic powder and onion powder create depth that makes people wonder what your secret is. Don't skip these — they're the difference between good pinwheels and "oh my god, what is in these?" pinwheels. The amounts might seem small, but they work together to create a flavor profile that's way more complex than the sum of its parts.
Everything's prepped? Good. Let's get into the real action...
The Method — Step by Step
- Start by beating your cream cheese in a medium bowl until it's smooth and spreadable. This should take about 30 seconds with a hand mixer or 2 minutes with a sturdy spatula and some elbow grease. You want it fluffy and light, not dense and brick-like. If you've ever struggled with this, you're not alone — and I've got the fix. The key is making sure your cream cheese is truly room temperature; cold cream cheese will fight you every step of the way and give you lumpy results that tear your tortillas.
- Now add your feta, cranberries, spinach, green onions, and all your seasonings to the bowl. This next part? Pure magic. Stir everything together with a rubber spatula, folding from the bottom up to distribute everything evenly without crushing the feta completely. You want those little cheese nuggets to stay intact so every bite has surprise pockets of salty goodness. The mixture should look like confetti — colorful and festive with visible chunks of each ingredient.
- Lay out your first tortilla on a clean surface and spread about 3 tablespoons of the mixture evenly across the surface. Here's where most people mess up — they spread it too thick or too thin. You want enough filling to make the pinwheel substantial but not so much that it squishes out the sides when you roll it. Think of it like spreading peanut butter on toast; even coverage without any bare spots, but not so thick that it oozes everywhere. The filling should go all the way to the edges except for about 1/4 inch at the far edge.
- Starting from the edge closest to you, roll the tortilla as tightly as you can without tearing it. This is the moment of truth — a slow, steady roll with gentle pressure creates those perfect spirals that make people think you're a kitchen wizard. If the tortilla cracks, don't panic; just press it back together and keep rolling. The warmth from your hands actually helps make the tortilla more pliable as you go. When you reach the end, press gently to seal the seam.
- Wrap each rolled tortilla tightly in plastic wrap, twisting the ends like a candy wrapper. This part is crucial — it compresses everything together so when you slice them later, they hold their shape perfectly. The pressure also helps the flavors meld together, creating that harmonious taste that makes people wonder what your secret ingredient is. Place them seam-side down in the fridge for at least 30 minutes, but up to 24 hours if you're planning ahead.
- When you're ready to serve, grab your sharpest knife and get ready for the fun part. Unwrap each roll and slice into 1/2-inch pieces using a gentle sawing motion. Don't press down hard or you'll squish them flat. A sharp knife should glide through like butter, creating those perfect spirals that show off all the colorful layers. Wipe your knife between cuts for the cleanest presentation — yes, it's a little extra work, but the results are worth it.
- Arrange them on your serving platter in concentric circles or in neat rows, and watch what happens. Within minutes, people will start hovering, asking what they are, grabbing "just one more" until suddenly the plate is empty. I dare you to taste this and not go back for seconds. The combination of creamy, tangy, sweet, and savory in one bite-sized package is pure addiction in the best possible way.
That's it — you did it. But hold on, I've got a few more tricks that'll take this to another level...
Insider Tricks for Flawless Results
The Temperature Rule Nobody Follows
Here's what separates the pros from the amateurs: your cream cheese temperature matters more than you think. Too cold and you'll tear your tortillas trying to spread it. Too warm and it'll slide around like an ice skater on a hot day. The sweet spot is when you can press your finger into it and leave an indentation, but it doesn't stick to your skin. This usually takes about 30-40 minutes on the counter, depending on your kitchen temperature. A friend tried skipping this step once — let's just say it didn't end well. Her filling was lumpy and her tortillas looked like they'd been through a paper shredder.
Why Your Nose Knows Best
When you're mixing your filling, stop and smell it. Seriously. Your nose knows when the balance is right before your taste buds do. You should get a whiff of tangy feta first, then a hint of sweet cranberry, with a fresh green note from the onions. If one aroma overpowers everything else, adjust before you start spreading. Too much onion smell? Add more cranberries. Can't smell the feta? Crumble in a bit more. This sensory check takes five seconds and prevents disappointing results.
The 5-Minute Rest That Changes Everything
After you spread the filling but before you roll, let the tortilla sit for exactly 5 minutes. This is when magic happens — the cream cheese slightly softens the tortilla from underneath, creating a bond that prevents the filling from sliding around. It's like they're getting to know each other before committing to the long roll together. Skip this step and your filling might try to escape during slicing, leaving you with half-empty pinwheels that look as sad as they taste.
The Sharp Knife Secret
I cannot stress this enough — use the sharpest knife you own, and if it's not sharp, get it sharpened before you attempt these. A dull knife will press down on your beautiful spirals and turn them into flat, sad discs that look like they've been sat on. The knife should glide through without any pressure from you. If you're sawing back and forth like you're cutting down a tree, your knife needs attention. The clean cuts not only look professional but also help the pinwheels hold their shape longer at room temperature.
The Fridge Positioning Trick
Where you place your wrapped rolls in the fridge matters more than you'd think. Don't cram them in the door where they'll get jostled every time someone opens it, and don't lay them flat where they might develop flat spots. Stand them upright in a stable container where they can chill undisturbed. Think of it like aging fine wine — they need peace and quiet to become their best selves. This attention to detail is what separates good pinwheels from legendary ones.
Creative Twists and Variations
This recipe is a playground. Here are some of my favorite ways to switch things up:
The Mediterranean Makeover
Swap the cranberries for chopped sun-dried tomatoes and add a tablespoon of chopped fresh basil to the mix. The tomatoes bring that same sweet-tart punch but with an herby, Mediterranean vibe that pairs beautifully with the feta. Add a pinch of dried oregano and suddenly you're transported to a Greek island, even if you're actually in your kitchen at 2 AM making snacks for tomorrow's meeting.
The Sweet Heat Version
Keep everything the same but add 2 tablespoons of chopped pickled jalapeños to the filling. The contrast between the sweet cranberries, salty feta, and spicy jalapeños creates this incredible flavor rollercoaster that keeps people coming back for more. It's like your taste buds can't quite figure out what's happening, but they definitely want more of it. This version disappears fastest at game day parties.
The Everything Bagel Edition
Replace the regular tortillas with everything bagel flavored wraps, and add 2 tablespoons of capers to the filling. The everything seasoning adds this incredible savory depth, while the capers bring little bursts of briny goodness that make the whole thing taste like your favorite bagel shop decided to make pinwheels. Serve these at brunch and watch them vanish faster than mimosas.
The Fall Harvest Twist
Add 1/4 cup of finely chopped toasted pecans and replace half the cranberries with chopped dried apricots. The nuts add this wonderful crunch and toasty flavor, while the apricots bring a different kind of sweetness that screams autumn comfort. A pinch of cinnamon ties it all together, making these perfect for Thanksgiving appetizers or fall book club meetings.
The Protein Power Pack
Add 1/2 cup of finely chopped cooked chicken breast to make these more substantial. This transforms them from appetizers to proper lunch fare that'll keep you satisfied for hours. The chicken adds protein without competing with the other flavors, making these perfect for meal prep or packing in lunch boxes. Kids love them because they're fun and colorful, parents love them because they're actually filling.
The Breakfast Version
Replace the spinach with chopped fresh chives, swap the feta for goat cheese, and add 3 tablespoons of cooked crumbled bacon. Suddenly you have breakfast pinwheels that are perfect for brunch buffets or holiday mornings. The goat cheese is tangier than feta, the bacon adds that smoky richness, and the chives keep things fresh and bright. These are dangerously good with coffee.
Storing and Bringing It Back to Life
Fridge Storage
Here's the beautiful thing about these pinwheels — they actually get better after a few hours in the fridge. The flavors have time to meld together, creating this harmonious blend that tastes like you've been working on them for hours. Store the unsliced rolls wrapped tightly in plastic wrap for up to 3 days, or sliced pinwheels in an airtight container with a piece of parchment paper between layers. The key is keeping them sealed so they don't absorb any weird fridge odors. Nobody wants pinwheels that taste like last night's leftover pizza.
Freezer Friendly
Okay, ready for the game-changer? You can freeze these! Wrap the unsliced rolls tightly in plastic wrap, then aluminum foil, and freeze for up to 2 months. When you're ready to serve, let them thaw in the fridge overnight, then slice and serve. The texture isn't quite as perfect as fresh, but they're still miles better than anything store-bought. This is my secret weapon for impromptu gatherings — I always have a few rolls stashed in the freezer for emergency entertaining.
Best Reheating Method
While these are best served cold or at room temperature, if your cream cheese filling gets too firm from the fridge, let them sit out for 15-20 minutes before serving. If they're looking a little dry (which happens after a day or two), add a tiny splash of water to the container before sealing it — it steams back to perfection. Whatever you do, don't microwave them unless you want sad, soggy pinwheels that fall apart at the slightest touch. Room temperature is your friend here.