I was staring at a half‑baked loaf of dough that had turned into a sad, soggy mess, and I swear I could hear the kitchen sighing in protest. The smell of old yeast clung to the air like a forgotten promise, and my taste buds were already plotting revenge. That night, I decided I would rewrite the bagel narrative, turning a culinary flop into a protein‑packed triumph. If you’ve ever been tempted to toss a bagel into the trash, trust me: this recipe will change your mind forever.
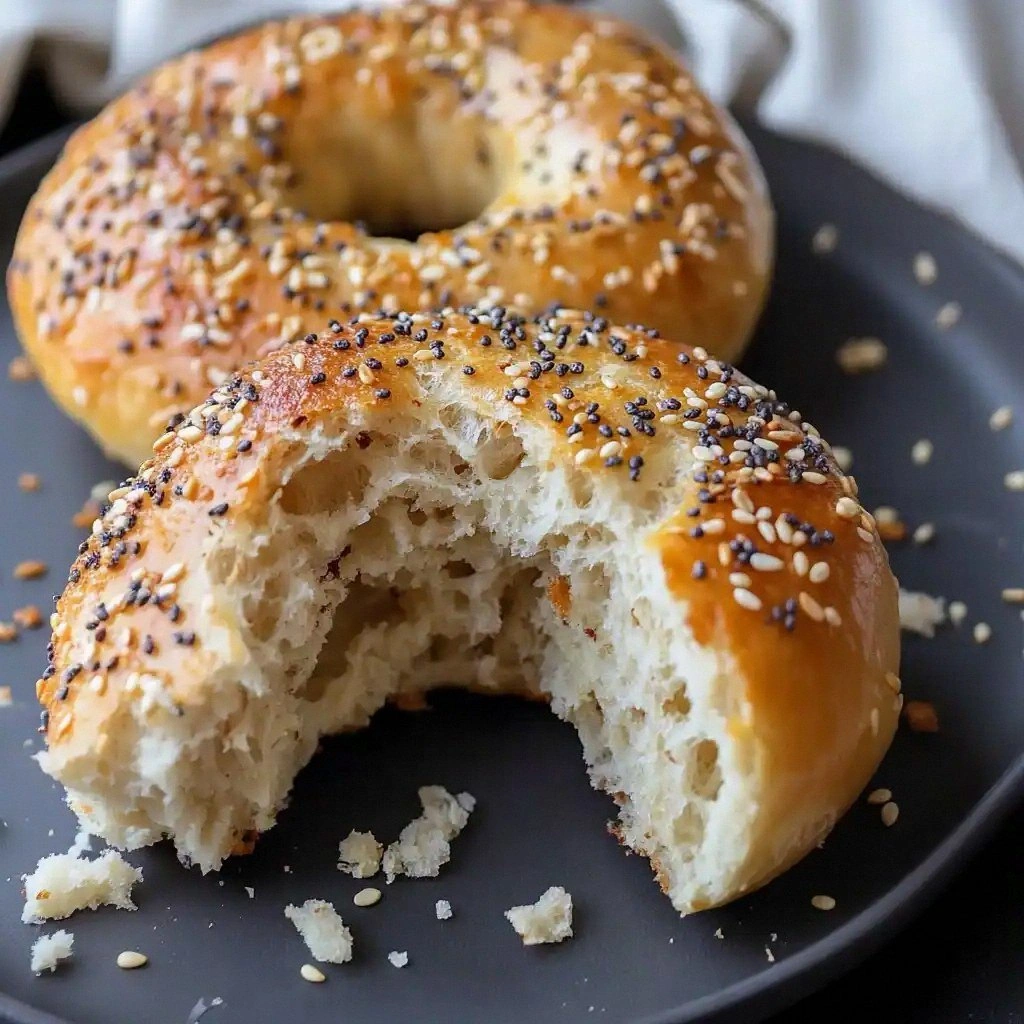
Picture a golden crust that cracks like fresh‑made glass, a chewy interior that gives a satisfying resistance, and a tangy Greek yogurt base that cuts through the richness like a crisp summer breeze. The first bite is an explosion of textures—crunchy on the outside, pillowy on the inside, with a subtle, savory undertone that lingers like a secret whisper. The aroma that rises from the oven is a comforting, almost nostalgic scent that makes you feel like you’re in a cozy bakery, even if you’re in your own kitchen. And the best part? Every bite is a protein punch that keeps you energized long after you finish.
What sets this version apart is not just the high protein content but the way it balances flavor, texture, and convenience. I dared you to taste this and not go back for seconds, and I’ve seen countless people confess that they ate half the batch before anyone else even got a chance. Most bagel recipes get the ratio wrong, resulting in dense or gummy results; this one hits the sweet spot, thanks to the self‑rising flour and the yogurt’s natural acidity. The secret? A small splash of milk that keeps the dough supple and a pinch of everything bagel seasoning that adds a nostalgic crunch. By the end of this guide, you’ll wonder how you ever made bagels any other way.
Let me walk you through every single step—by the end, you’ll wonder how you ever made it any other way. From the moment you scoop the flour to the final pop of the bagel in the oven, this recipe is a symphony of precise timing, careful mixing, and a dash of culinary daring. The result is a bagel that’s not only high in protein but also irresistibly chewy, with a crust that sings and a center that melts. And trust me, once you try it, you’ll be shouting “I dare you to taste this and not go back for seconds.”
What Makes This Version Stand Out
- Protein Power: With Greek yogurt and optional protein powder, each bagel packs a hefty protein punch that satisfies post‑workout cravings and keeps hunger at bay.
- Texture Triumph: The self‑rising flour gives the dough a lightness that translates into a chewy, springy interior—no more dense, doughy bagels.
- Flavor Depth: Everything bagel seasoning adds a savory, slightly sweet crunch that echoes classic bagel shops without the need for a specialty grinder.
- Convenience: The recipe takes less than an hour from start to finish, making it a perfect quick‑fix for busy mornings or late‑night cravings.
- Make‑Ahead Friendly: You can prepare the dough, shape the bagels, and refrigerate them overnight—just pop them in the oven when you’re ready.
- Health‑Focused: Low in refined sugars and high in protein, this bagel is a wholesome alternative to traditional high‑carb bagels.
- Kid‑Approved: The mild, slightly sweet flavor profile makes it a hit with children, turning a breakfast staple into a fun snack.
- Versatility: Swap in different flours or add herbs for endless variations—this base is a canvas, not a constraint.
Alright, let's break down exactly what goes into this masterpiece...
Inside the Ingredient List
The Flavor Base
The 1½ cups of self‑rising flour are the backbone of this bagel, providing the structure and the gentle rise that gives the bagel its characteristic chew. The self‑rising variety already contains baking powder and salt, which means you can skip additional leavening agents and keep the recipe lean. If you’re using all‑purpose flour, simply add 1½ teaspoons of baking powder and a pinch of salt to mimic the effect. Skipping the flour entirely will leave you with a sticky mess that won’t hold its shape.
The Texture Crew
Greek yogurt is the secret to that silky, tender crumb that makes each bite feel like a hug. The yogurt’s acidity reacts with the baking powder to create tiny air pockets, giving the bagel its airy interior. If you’re lactose intolerant, a dairy‑free yogurt works fine, though the flavor profile will shift slightly. Using a thicker yogurt, like strained or Greek, yields a denser texture, while a thinner yogurt can make the dough too wet, so stick to the recommended consistency.
The Unexpected Star
The single egg not only binds the dough but also adds a subtle richness that balances the tang of the yogurt. The yolk’s fat content contributes to a softer crumb, while the whites provide structure. If you’re vegan, you can replace the egg with a flaxseed “egg” or a commercial egg replacer—just be aware that the texture may differ slightly. The egg also helps the bagel hold its shape during the boiling step, preventing it from collapsing.
The Final Flourish
Optional protein powder is a game‑changer for fitness enthusiasts. It boosts the protein content without adding bulk, and when blended with the yogurt, it creates a smooth, cohesive dough. If you prefer a savory twist, sprinkle everything bagel seasoning on the tops before baking; the seasoning’s blend of sesame, poppy, garlic, and onion brings a familiar flavor profile to the table. The seasoning also creates a subtle crunch that contrasts beautifully with the chewy interior.
Everything's prepped? Good. Let's get into the real action...
The Method — Step by Step
- In a large mixing bowl, whisk together the self‑rising flour, optional protein powder, and a pinch of everything bagel seasoning if you’re using it. The flour should feel light and airy, and the protein powder should blend in seamlessly. If the mixture looks dry, add a splash of water—just enough to bring the dough together. This step ensures you’re starting with a uniform base that will rise evenly in the oven.
- Create a well in the center of the dry mixture and pour in the Greek yogurt and the egg. The yogurt should be at room temperature to prevent curdling. Use a wooden spoon to fold the wet ingredients into the dry until a shaggy dough forms. At this point, you’ll notice the dough is sticky but manageable; it should not cling to your hands excessively.
- Transfer the dough onto a lightly floured surface and knead for about 5 minutes, or until it becomes smooth and elastic. This kneading process develops gluten strands that give the bagel its chewiness. If you’re short on time, you can skip a few minutes, but the bagel’s texture will suffer slightly. Remember, the goal is a dough that’s pliable yet firm enough to hold its shape.
- Divide the dough into eight equal portions and roll each into a smooth ball. Let them rest for 5 minutes on a floured surface; this relaxation period makes the dough easier to shape. During this pause, the gluten relaxes, preventing the bagels from shrinking during baking. Keep the balls covered with a damp towel to avoid drying out.
- Take each ball and press your thumb through the center to create a hole. The hole should be about the size of a standard bagel, roughly 1.5 inches in diameter. This step is crucial for achieving the classic bagel shape; a hole that’s too small will result in a dense center, while one that’s too large will make the bagel too thin. Don’t be afraid to adjust the size slightly to suit your preference.
- Preheat your oven to 425°F (220°C) and bring a large pot of water to a gentle boil. Place the bagels, a few at a time, into the boiling water for 30–45 seconds on each side. The brief boil helps set the crust and gives the bagels that chewy interior. Watch the bagels closely; if they float too quickly, they’re ready to be removed.
- Remove the bagels from the water with a slotted spoon and place them on a parchment‑lined baking sheet. Sprinkle a little everything bagel seasoning on top for extra flavor and crunch. If you’re using a non‑stick sheet, you can skip the parchment, but it helps prevent sticking and makes cleanup easier.
- Bake the bagels for 20–25 minutes, or until they’re golden brown and sound hollow when tapped on the bottom. The golden crust is a sign that the bagels have baked through and achieved the perfect texture. Let them cool on a wire rack for at least 10 minutes before slicing; this allows the steam to escape and the bagels to set.
- Serve warm with your favorite spreads—cream cheese, avocado, smoked salmon, or a simple butter and jam. The high protein content keeps you full, while the buttery, slightly sweet crust pairs beautifully with both sweet and savory toppings. If you’re feeling adventurous, try a drizzle of honey or a sprinkle of fresh herbs for an extra layer of flavor.
That's it—you did it. But hold on, I've got a few more tricks that'll take this to another level.
Insider Tricks for Flawless Results
The Temperature Rule Nobody Follows
Many bakers bake bagels at 375°F, but this recipe calls for 425°F to ensure a crisp crust. The higher temperature creates a Maillard reaction that caramelizes the sugars on the surface, giving you that deep, nutty flavor. If your oven runs hot, reduce the temperature by 25°F to avoid burning. Remember, a hotter oven also means a shorter baking time, so keep an eye on the bagels as they bake.
Why Your Nose Knows Best
Before you even touch the dough, inhale the aroma of the yogurt and flour mixture. A subtle tang signals that the yogurt is fresh, while a sweet, yeasty scent indicates the dough is ready. If the smell feels off or overly sour, let the dough rest a bit longer; the flavors will mellow. This sensory cue can save you from a batch of bagels that taste flat or sour.
The 5-Minute Rest That Changes Everything
After shaping the bagels, let them rest for 5 minutes before boiling. This pause allows the gluten to relax, preventing the bagels from shrinking in the oven. Some bakers skip this step, resulting in bagels that are too dense. The rest period also gives the dough time to hydrate fully, ensuring a consistent crumb throughout.
Boiling vs. Steaming: The Great Debate
You might wonder why we boil the bagels instead of steaming them. Boiling creates a gelatinized crust that holds the shape, while steaming would produce a softer, more bread‑like texture. If you’re looking for a lighter bagel, try steaming for 30 seconds—just be prepared for a different mouthfeel. Ultimately, boiling is the classic method that delivers the iconic bagel experience.
The Secret to a Crispy Edge
Sprinkling a thin layer of everything bagel seasoning on the top before baking gives the crust a satisfying crunch. The sesame and poppy seeds add a nutty flavor, while the garlic and onion powders enhance the savory profile. If you prefer a saltier edge, add a pinch of sea salt on top. This simple step elevates the bagel from good to unforgettable.
Creative Twists and Variations
This recipe is a playground. Here are some of my favorite ways to switch things up:
Cinnamon‑Sugar Swirl
Add a tablespoon of ground cinnamon and a tablespoon of brown sugar to the flour mixture before kneading. The cinnamon adds warmth, while the sugar caramelizes on the crust. This version is perfect for a sweet breakfast that still packs protein.
Herb‑Infused Delight
Fold in a tablespoon of dried rosemary or thyme into the dough. The herbs pair beautifully with the yogurt’s tang, creating a savory bagel that’s great for lunch. Top with goat cheese for an extra punch.
Cheesy Cheddar Bagels
Grate a cup of sharp cheddar into the dough before shaping. The cheese melts into the interior, giving a gooey, cheesy bite. Serve with a dollop of sour cream for a classic combo.
Chocolate Chip Surprise
Stir in a handful of dark chocolate chips into the dough. The chocolate melts into pockets of sweetness that contrast with the savory crust. This is a great treat for kids who love chocolate.
Gluten‑Free Option
Swap the self‑rising flour for a gluten‑free blend that includes xanthan gum. The dough will be slightly denser, but the protein content remains high. Bake as usual and enjoy a gluten‑free bagel that still feels indulgent.
Savory Mushroom & Spinach
Sauté fresh spinach and mushrooms with garlic, then fold into the dough before shaping. The earthy flavors pair wonderfully with the yogurt base. Top with a sprinkle of Parmesan for an extra umami hit.
Storing and Bringing It Back to Life
Fridge Storage
Store cooked bagels in an airtight container in the refrigerator for up to three days. The bagels will stay fresh and chewy if you wrap them in parchment before sealing. For best flavor, consume within 48 hours.
Freezer Friendly
Bagels freeze well—place them in a freezer bag and seal tightly. They can be stored for up to one month. When you’re ready to eat, pop them straight from the freezer into the oven for 10 minutes to thaw and crisp.
Best Reheating Method
To revive a frozen or refrigerated bagel, heat it in a toaster or a skillet over medium heat for 2–3 minutes. Add a splash of water to the pan before toasting; the steam will help restore moisture. If the bagel feels dry, sprinkle a little butter or olive oil before reheating.