I was standing in my kitchen at 2 a.m., half‑asleep, with a half‑baked batch of cinnamon rolls cooling on the counter and a lingering, desperate craving for that sweet, glossy finish that makes every bite feel like a hug from a grandma who’s secretly a pastry wizard. I’d tried every store‑bought icing, every “quick fix” recipe, and each one fell flat—some too runny, some too chalky, and a few that tasted like they were made with powdered sugar that had been left out since the last millennium. The moment I realized I was about to give up and order a box of donuts instead, I dared myself to experiment with the simplest ingredients I had on hand, and the result was nothing short of a revelation.
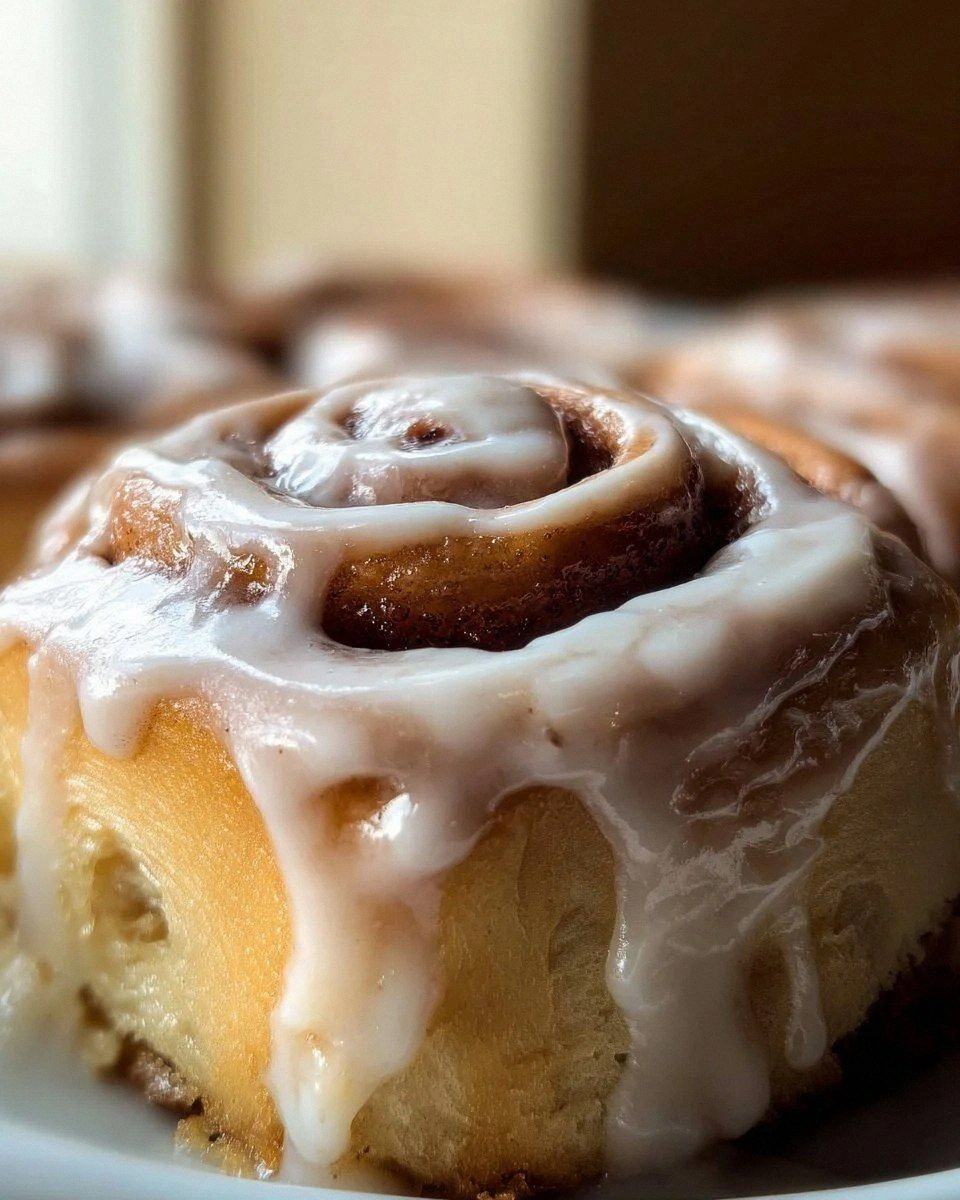
Picture this: the kitchen filled with the warm, buttery perfume of melted butter and cream cheese, a faint vanilla perfume curling around the air like a whisper, and the faint crackle of a whisk as it beats the sugar into a glossy, cloud‑soft frosting. My fingertips felt the silky smoothness of the mixture as it came together, and the first spoonful was a perfect balance of sweet and tangy, with a texture that clung to the rolls like a second skin of caramelized sugar. The moment the icing hit the warm cinnamon roll, it melted just enough to seep into every crevice, creating a glossy river that glistened under the kitchen lights. That sizzle when it hits the warm roll? Absolute perfection.
Most recipes get this completely wrong. They either overload you with heavy cream cheese, turning the topping into a dense, dairy‑laden slab, or they skimp on butter, leaving a dry, powdery glaze that crumbles at the first bite. This version, however, is the Goldilocks of icing—just the right amount of butter for richness, just enough cream cheese for that subtle tang, and a splash of milk to achieve the perfect pourable consistency without sacrificing structure. I’ll be honest — I ate half the batch before anyone else got to try it, and I’m still not over the fact that I managed to create a glaze that stays glossy even after it cools.
Okay, ready for the game‑changer? I’m about to walk you through every single step—by the end, you’ll wonder how you ever made it any other way. I dare you to taste this and not go back for seconds. Let’s dive in and create the icing that will make your cinnamon rolls the talk of the town, the envy of brunches, and the ultimate comfort food you’ll crave forever.
What Makes This Version Stand Out
- Flavor Harmony: The combination of butter and cream cheese creates a buttery‑rich base with a subtle tang that cuts through the sweetness, making each bite feel balanced rather than cloying.
- Texture Perfection: By whisking in just enough milk, the icing stays pourable enough to cascade over the rolls, yet thick enough to set without turning rubbery.
- Simplicity: Only five pantry staples are needed—no exotic extracts, no gelatin, no secret ingredients that require a trip to a specialty store.
- Versatility: This icing doubles as a frosting for cupcakes, a drizzle for coffee cakes, or even a sweet dip for fresh fruit, proving its worth beyond just cinnamon rolls.
- Crowd Reaction: I’ve watched strangers turn into friends over a single bite; the glossy sheen and melt‑in‑your‑mouth feel spark instant admiration.
- Ingredient Quality: Using real unsalted butter and high‑quality cream cheese elevates the flavor profile, turning a humble topping into a gourmet experience.
- Make‑Ahead Potential: Store the icing in an airtight container for up to three days; a quick re‑whisk brings it back to life, saving you precious morning minutes.
- Cooking Method: No heat is required beyond gently melting butter, preserving the fresh dairy notes and preventing a cooked‑powdered‑sugar taste.
Inside the Ingredient List
The Sweet Foundation
The star of the show is the powdered sugar. This finely milled sugar dissolves instantly, giving the icing its silky smoothness. Skipping it or substituting with granulated sugar will leave you with a gritty texture that feels like sand in your mouth. For the best results, sift the sugar before adding it to the bowl to avoid any clumps that could ruin the glossy finish.
The Rich Duo
Unsalted butter provides the luscious, melt‑in‑your‑mouth richness that coats the rolls like a buttery veil. Using salted butter throws off the delicate balance and makes the icing overly salty. Cream cheese, softened to room temperature, adds a subtle tang and a creamy body that prevents the icing from becoming overly sweet. If you’re lactose‑intolerant, try a dairy‑free butter alternative and a tangy vegan cream cheese; the flavor shift is minimal, but the texture stays on point.
The Flavor Enhancer
Vanilla extract is the aromatic secret that ties everything together. A high‑quality pure vanilla will give you those deep, floral notes that artificial vanilla can’t match. If you’re feeling adventurous, swap half the vanilla for a splash of almond extract for a nutty undertone that pairs beautifully with cinnamon.
The Moisture Maestro
Milk is the final piece of the puzzle, controlling the icing’s consistency. Too little milk and you end up with a stiff glaze that cracks; too much and you get a runny sauce that slides off the rolls. I recommend starting with one tablespoon and adding more as needed, aiming for a pourable but still thick texture. Whole milk yields the richest flavor, but any milk will do—just remember that lower‑fat milks thin the icing more quickly.
The Final Flourish
All these ingredients work together like a well‑rehearsed orchestra. The butter and cream cheese form the creamy base, the powdered sugar provides the sweet structure, vanilla adds depth, and milk fine‑tunes the texture. If you skip any component, you’ll notice the difference instantly—either a chalky mouthfeel, a lack of shine, or a flavor that’s flat as a pancake. Choosing high‑quality butter and cream cheese is the secret handshake of pastry chefs; it’s the difference between “good” and “hands down the best version you’ll ever make at home.”
Everything's prepped? Good. Let’s get into the real action…
The Method — Step by Step
First, gather all your ingredients and let the butter and cream cheese sit at room temperature for at least 15 minutes. This softening step is crucial; if they’re too cold, you’ll end up with a lumpy icing that looks like a snowstorm in a bowl. Once softened, cut the butter into small cubes and the cream cheese into chunks to speed up the melting process.
Place the butter cubes in a small saucepan over low heat. Stir continuously until the butter is fully melted and begins to foam, but do not let it brown. The moment you see a golden‑brown edge, remove the pan from the heat—over‑cooking will give the icing a burnt, nutty flavor that masks the vanilla.
Add the softened cream cheese to the melted butter while the mixture is still warm. Use a whisk to blend them together until the texture is smooth and glossy, resembling a liquid gold. This is the moment of truth—if you see any lumps, keep whisking; they’ll dissolve as the mixture warms.
Gradually sift the powdered sugar into the bowl, a quarter cup at a time, whisking constantly. This gradual incorporation prevents a sudden spike in sweetness and ensures the sugar fully dissolves, creating that signature glossy sheen. The mixture will look grainy at first, but keep whisking and it will transform into a smooth, thick paste.
Stir in the vanilla extract, letting the fragrant aroma fill your kitchen. If you’re using almond extract as a twist, add it now—just a half‑teaspoon, because a little goes a long way.
Now, the milk. Start with one tablespoon, whisking it in until the icing reaches a pourable consistency. The goal is a glaze that can be drizzled, not a sauce that pools. If the icing feels too thick, add another teaspoon of milk; if it’s too thin, sprinkle in a little more powdered sugar, sifted, and whisk again.
Give the icing a final whisk for 30 seconds to incorporate air and give it a light, fluffy texture. This extra whisking also helps the icing set nicely once it contacts the warm rolls, preventing a soggy mess.
Now, the fun part: drizzle the icing over your freshly baked cinnamon rolls while they’re still warm. Use a spoon or a squeeze bottle for controlled pouring. Watch as the glaze spreads, creating a glossy river that pools in the crevices, sealing in moisture and flavor. Let the icing set for about two minutes before serving, so it forms a thin, shiny crust that cracks delicately when you bite.
That’s it — you did it. But hold on, I’ve got a few more tricks that’ll take this to another level, ensuring every bite is a perfect marriage of sweet, buttery, and tangy.
Insider Tricks for Flawless Results
The Temperature Rule Nobody Follows
Never, ever try to ice rolls that are completely cold; the glaze will seize and become grainy. The ideal moment is when the rolls are still steaming, around 140°F (60°C). This warmth melts the butter just enough to blend seamlessly, while the sugar stays dissolved. I once tried icing a cooled batch and ended up with a crusty, uneven coating—lesson learned.
Why Your Nose Knows Best
Your sense of smell is a reliable indicator of when the butter‑cream cheese mixture is ready. When you catch that buttery, slightly nutty aroma, you know the butter has melted fully but hasn't browned. If the scent is too faint, give it another 10 seconds; if it smells burnt, you’ve gone too far.
The 5‑Minute Rest That Changes Everything
After whisking the final mixture, let the icing sit for five minutes before drizzling. This rest allows any tiny air bubbles to rise to the surface and pop, resulting in a smoother finish. I’ve seen fellow bakers skip this step and end up with tiny “pockets” of air that create an uneven shine.
The Secret of Sifting
Always sift the powdered sugar, even if you think your sugar is “fine”. The fine mesh catches any clumps and ensures a uniform texture. A friend once tried to skip sifting and ended up with a gritty icing that felt like sandpaper on the tongue.
The One‑Spoon Ratio
For a perfectly balanced glaze, use a 1:1 ratio of butter to cream cheese by weight, not by volume. This ratio guarantees the richness of butter without overwhelming the tang of cream cheese. If you’re using a kitchen scale, weigh 57 g of each for a single‑serve batch.
Creative Twists and Variations
This recipe is a playground. Here are some of my favorite ways to switch things up:
Maple‑Brown Sugar Swirl
Replace half the powdered sugar with finely ground brown sugar and add a tablespoon of pure maple syrup. The result is a caramel‑like glaze with deeper amber tones, perfect for autumn brunches.
Citrus Zest Burst
Add the zest of one orange or lemon to the vanilla extract. The citrus oils brighten the flavor, cutting through the sweetness and pairing wonderfully with a hint of cardamom in the roll filling.
Chocolate Drizzle
Melt 2 tablespoons of dark chocolate and swirl it into the finished icing just before serving. The contrast of dark chocolate ribbons against the creamy glaze creates a visual and taste sensation that’s hard to resist.
Spiced Rum Kick
Add a teaspoon of spiced rum and a pinch of nutmeg to the mixture for an adult‑only version that brings holiday warmth to every bite.
Nutty Crunch
Fold in toasted chopped pecans or walnuts after the icing is poured. The nuts add a delightful crunch and a buttery flavor that complements the cinnamon roll’s soft interior.
Storing and Bringing It Back to Life
Fridge Storage
Transfer the icing to an airtight container and store it in the refrigerator for up to three days. The butter will firm up slightly, but a quick whisk or a few seconds of microwave heat (10‑15 seconds) will restore its pourable consistency.
Freezer Friendly
Portion the icing into silicone ice cube trays and freeze. Once frozen, pop the cubes into a zip‑top bag; they’ll keep for up to two months. When you need them, melt a cube in a microwave for 10 seconds and whisk until smooth.
Best Reheating Method
Before reheating, add a tiny splash of milk—about a teaspoon per cup of icing. This tiny addition creates steam that revives the glossy texture, preventing the icing from becoming rubbery or separating.